
Accurate Miniatures 1:48 F-6B Photo Reconnaissance Mustang
|
Larry Z. Daily’s Personal Page Accurate Miniatures 1:48 F-6B Photo Reconnaissance Mustang |
| This model is the fifth in my Mustang
series. This build is an Accurate Miniatures F-6B. The F-6B was a P-51A with a camera installed behind the pilot’s seat.
I never really intended to build this model; I thought I was done with the Allison Mustangs when I finished my F-6A. I had bought
the kit on eBay before I decided that the project was getting too big. When I decided to only build one F-6, I thought that I
could use it for spares if I messed up any of my planned builds. As I was revising the main project page, though, and thinking about
all of my planned models, I realized that none of my planned builds included a Malcolm canopy. Since many of the razorback Mustangs
were fitted with the Malcolm canopy, my collection wouldn’t have been complete without at least one.
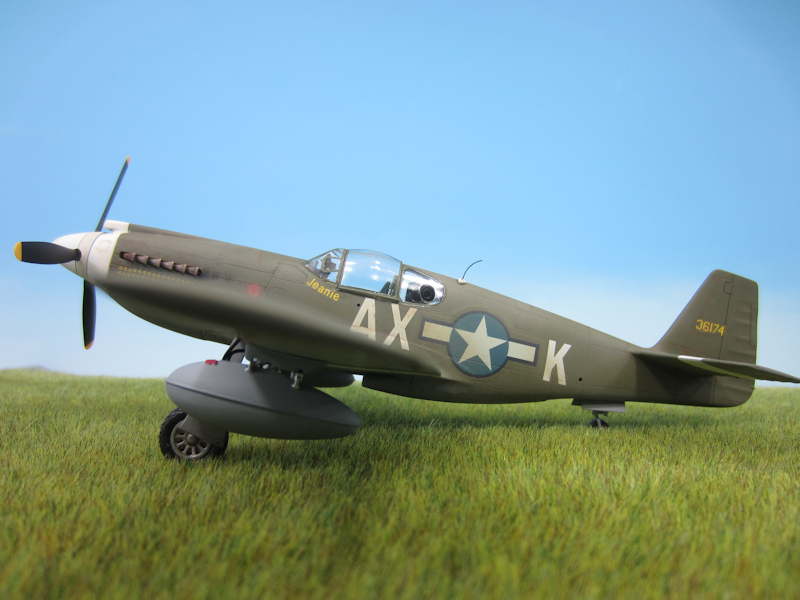
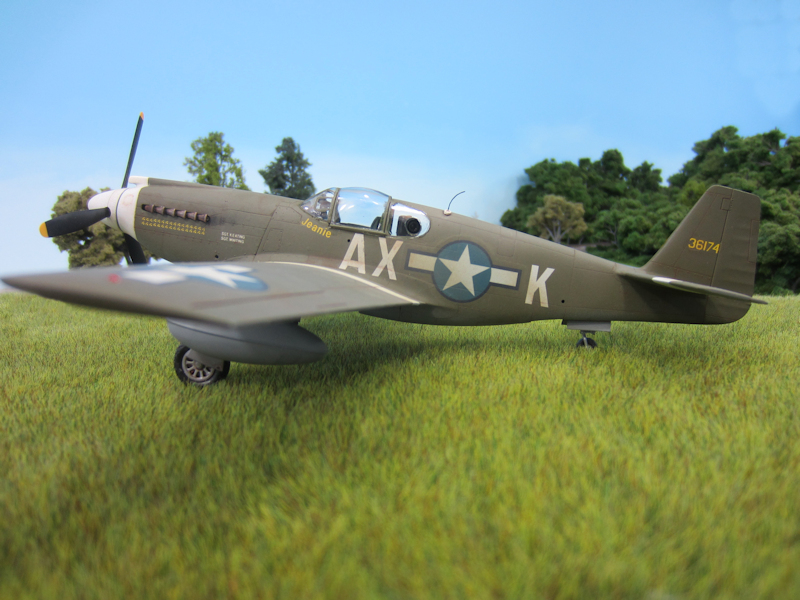
Every example of this kit that I found built up online used the kit decals. I really wanted something different for my build. I found a set of decals (possibly by Superscale) that included markings for a Malcolm-equipped F-6B serial number 36174. The aircraft bore the squadron code AX * K and was nicknamed Jeanie. Jeanie was assigned to the 107th Tactical Reconnaissance Squadron of the 67th Tactical Reconnaissance Group. The squadron flew out of LeMolay Aerodrome in France in 1944. Prototype: Model: P-51A-10-NA Serial number: 43-6174 Nickname: Jeanie Pilot: unknown Kit: Accurate Miniatures 1:48 F-6B Mustang In addition to the kit, I also used the following aftermarket parts:
|
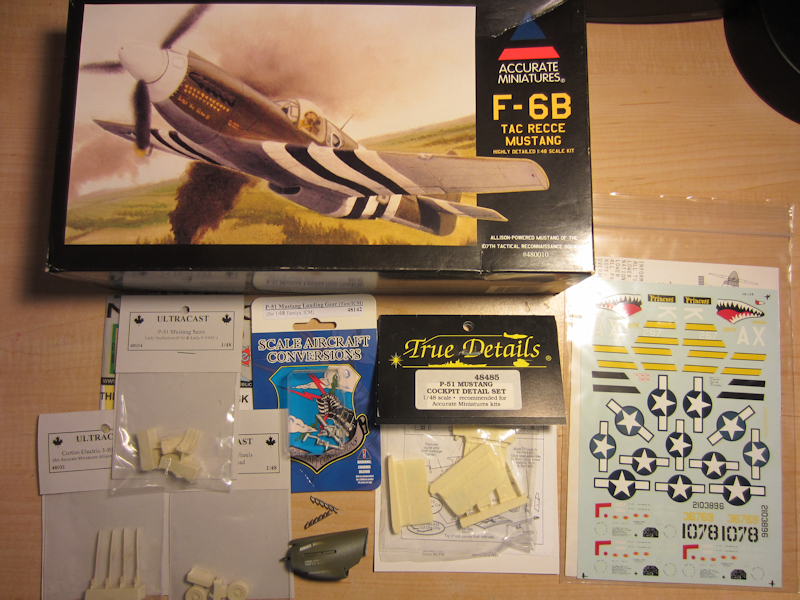 |
(1) The kit and all the aftermarket goodies that I plan to use. |
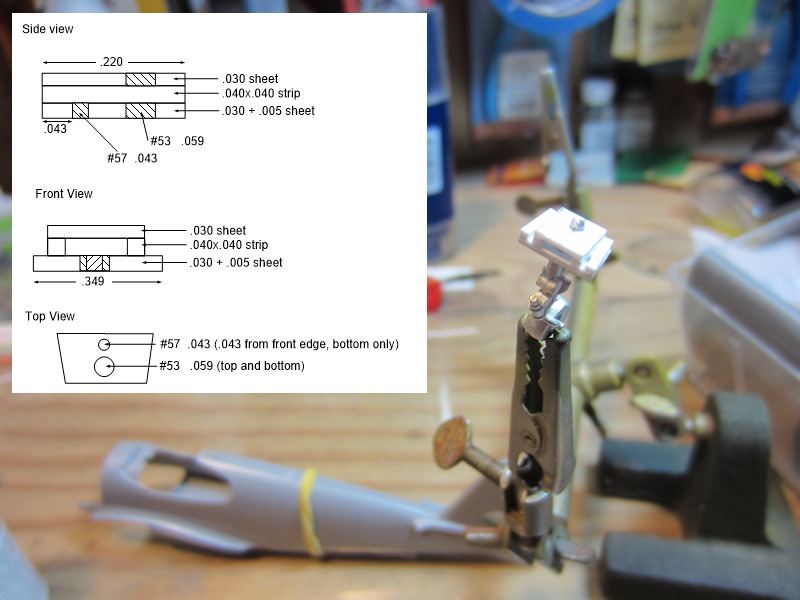 |
(2) I like to use the Scale Aircraft Conversions metal landing gear struts.
They are intended for the Tamiya kits, though, so the tail wheel won’t work without
doing some surgery. This photo shows the details of my not-really-a-Tamiya-clone tail wheel mount
for the Accurate Miniatures Mustangs. |
 |
(3) Here's the new mount in the fuselage alongside a Tamiya P-51B. |
 |
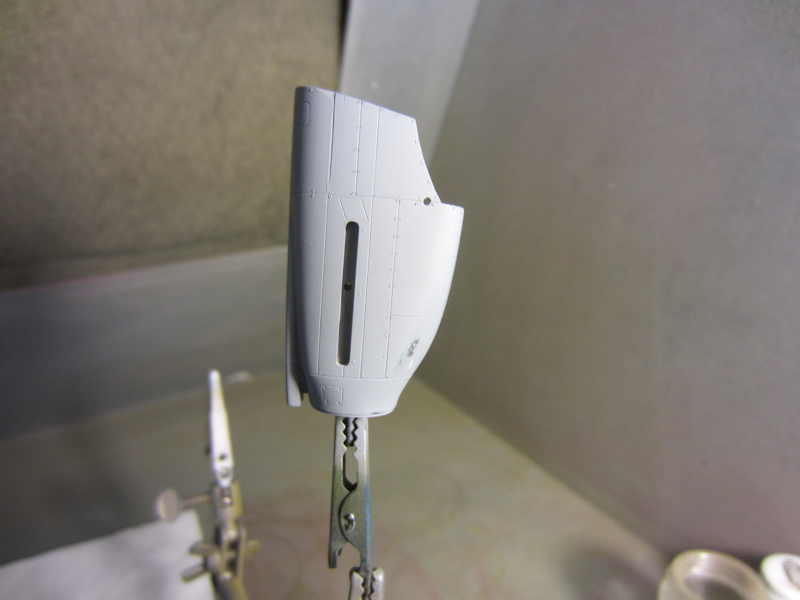
(4) A Finescale Modeler forum member (GreenStyrene48) alerted me to the fact that the AM F-6B came
with the nose for a P-51/F-6A (long, narrow carb intake). I did, however, have the remains of my
first attempt at an A-36 in my spares box. A little flexing, a little prying, and a few off-color
words separated the nose from the rest of the fuselage. I thought I’d managed it with no real damage,
but as I was filling the bypass door with styrene strip, I noticed that I had broken off a sliver on
the rear of the port side. A little strip styrene and some sanding took care of that. I’ve
tried replacing the missing fasteners with HO scale Archer rivets; I plan to spray a coat of primer
this weekend to see how they look. |
 |
(5) Well, plan A for repairing the nose didn’t work. A coat of primer
revealed that the styrene strip patch looked pretty horrible. Plan B involved cutting away the
damaged part along the scribed panel lines and patching in a piece cut from the incorrect
nose included with the AM F-6B kit. I think this attempt is useable, though the one panel
line (where the seam is) looks a bit exaggerated. |
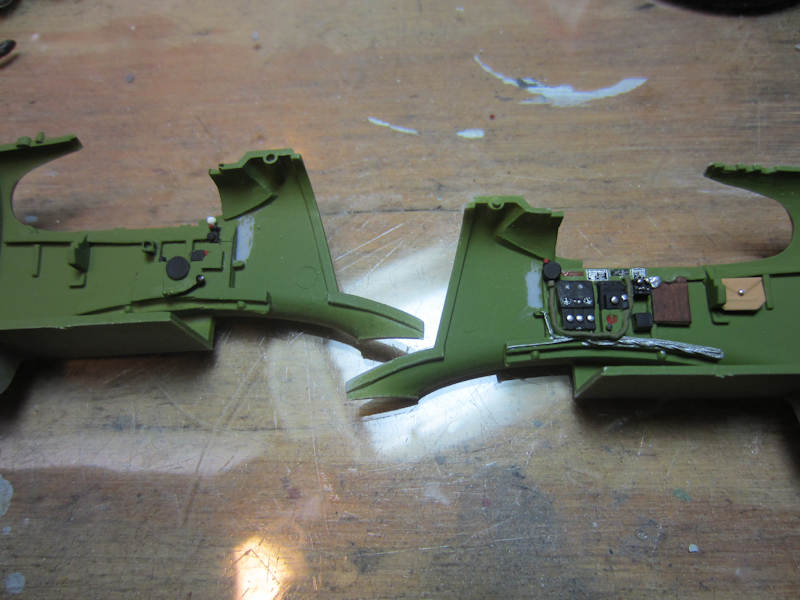 |
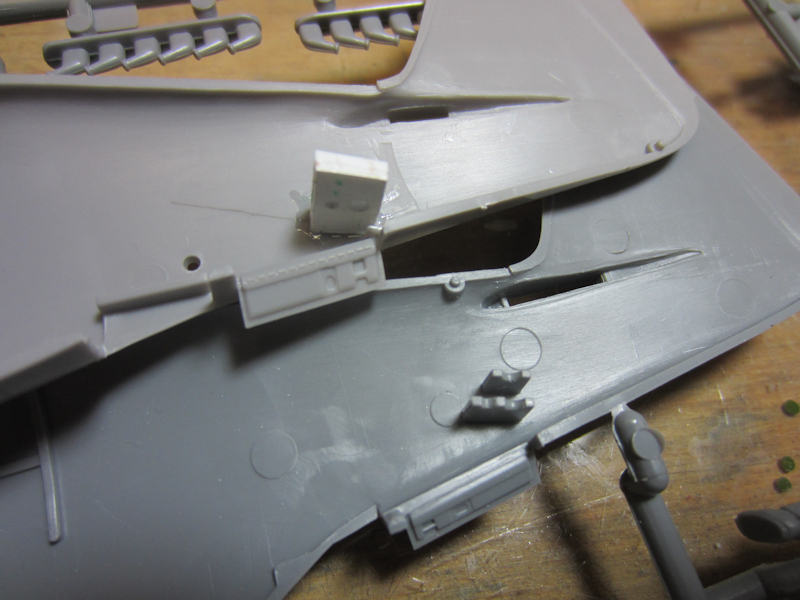
(6) Here are the cockpit sidewalls. I still need to tweak a few details
and add some weathering, but I think they look OK. Because I’ll be using a Malcolm
canopy, the interior on this build will be a bit more visible than on my other Mustangs,
so I’m trying to put a little more effort into this cockpit. I used stencil decals
on the starboard sidewall and I added the flare gun port to the port sidewall. |
 |
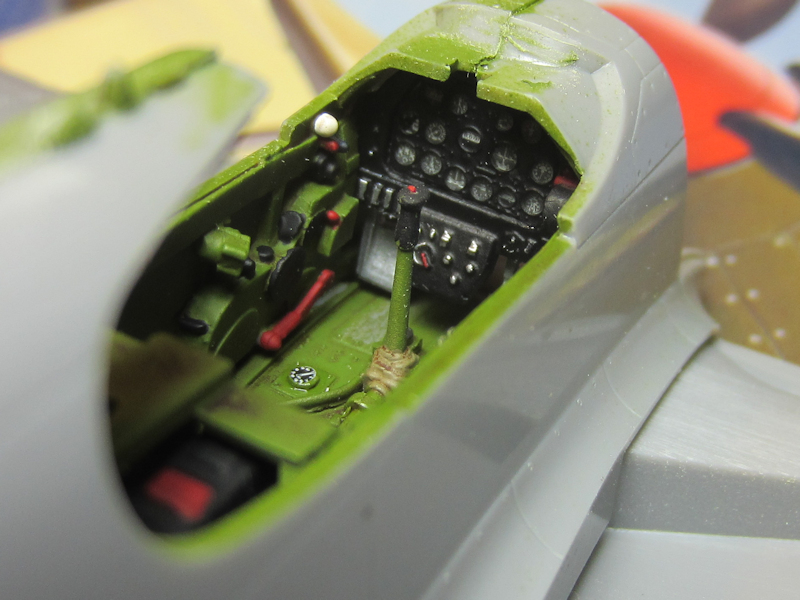
(7) More interior pieces. I still need to paint the boot at the base of
the control stick and I plan to add a firing button. |
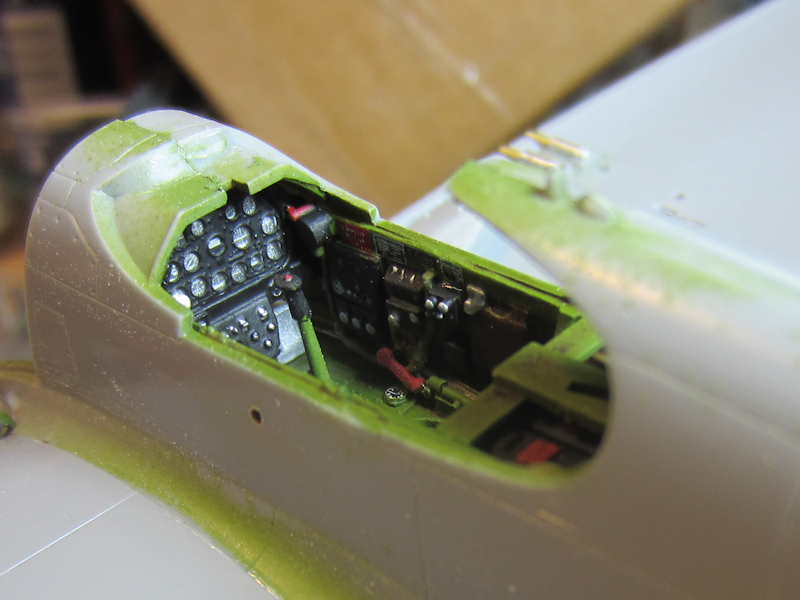 |
(8) I've got the fuselage closed up and the instrument panel installed.
For the first time I used the True Details instrument panel rather than the one that came
with the kit. I did, however, dress it up with a photoetched piece from an Aires P-51B IP
in my parts box. |
 |
(9) Here’s another view of the cockpit. I’m pretty
happy with it so far. |
 |
(10) Jeanie has had a trip (several, actually) to the paint booth. I was
following the painting diagram that came with the decals, which simply called for Olive Drab
over Neutral Gray. Of course, right after I sprayed those colors, I finally obtained a
photo of the plane that clearly showed a white nose and white ETO ID stripes on the wings. |
 |
(11) I have the decals on, but I am NOT a happy camper. In the photo, the
32 mission markings stretched from right behind the white on the nose to the panel line in
front of the crew names. The decal doesn’t come close to that. Then there are the
letters. The photo clearly shows the “AX” right below the cockpit; the A is just
aft of the flare gun port. The decal letters are over large and moving them that far forward
would have put the bottom 1/3 of the “A” on the wing. Not sure what I’m
going to do at this point. |
 |
(12) After some searching, I found replacement letters at
Kits-World. I
ordered a sheet and set about removing the too-large letters. I had to do a bit
of touch up to the paint, but the removal went pretty well overall. After a
surprisingly short wait (Kits-World is in Great Britain), the decals arrived and
I was back in business. This is the first time I’ve used Kits-World decals
and they worked out pretty well. They snuggled down with no problems and didn’t
really even need setting solution. Once the decals were on, I overcoated them with
Future. When that was dry, I accented the panel lines with a burnt umber oil paint wash
and then over sprayed the whole model with a light coat of Model Masters Afrika
Khakibraun. Next up is a final coat of Model Masters Flat Clear. |
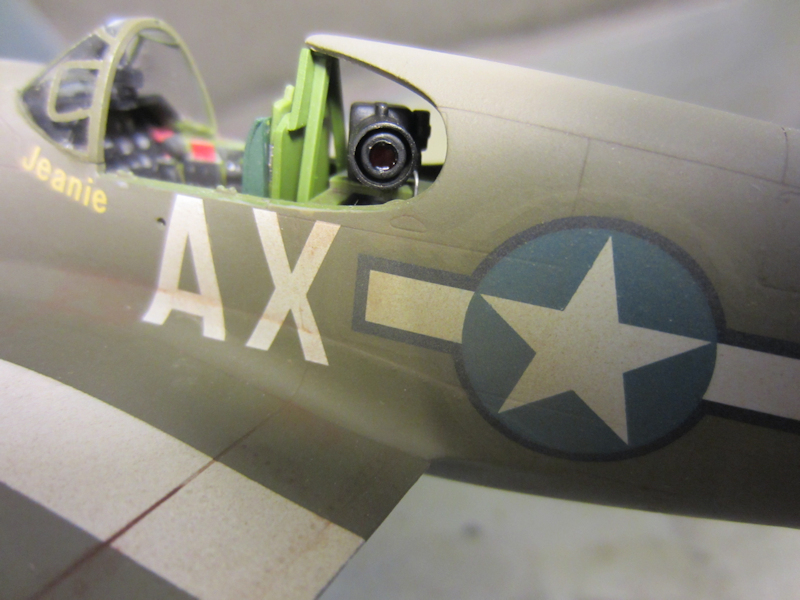 |
(13) I decided to try and dress up the camera a little on this build. I
had read in one online review that the kit piece was just a blob, but I didn’t find it
to be that bad. According to the photos that I found, though, the kit had it oriented wrong
and most showed a shade (?) around the lens. So, I cut off the mounting lug, rotated the
part, and added a shade made from a piece of brass tubing. I also added a cable, just visible
at the lower aft corner of the camera. I gave it an overall coat of flat black. To try and
replicate the look of camera lenses that I’ve seen up close, I first painted the lens area with
Insignia Blue. When that was dry, I overcoated it with Tamiya Transparent Red. |
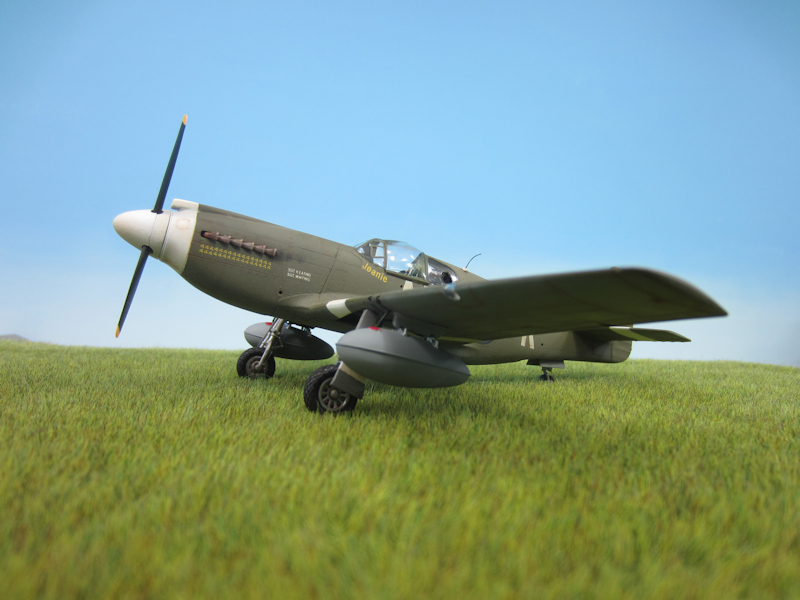 |
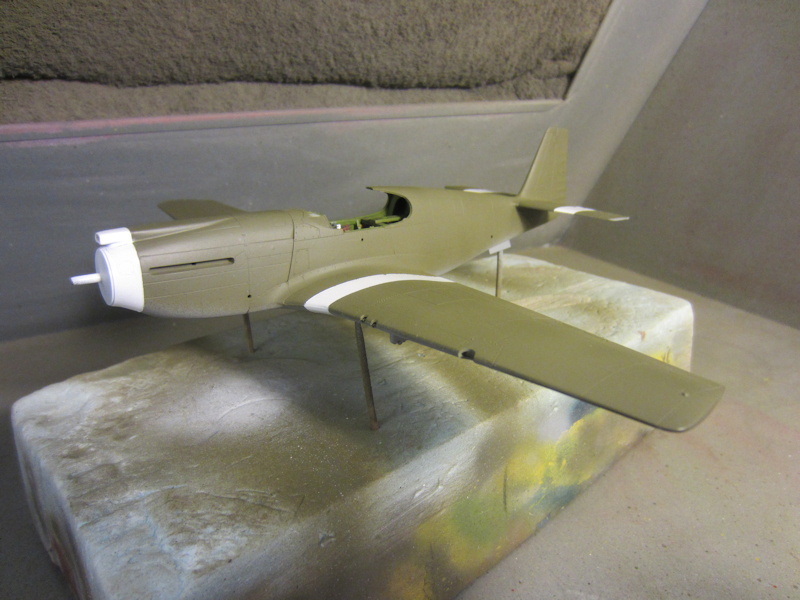
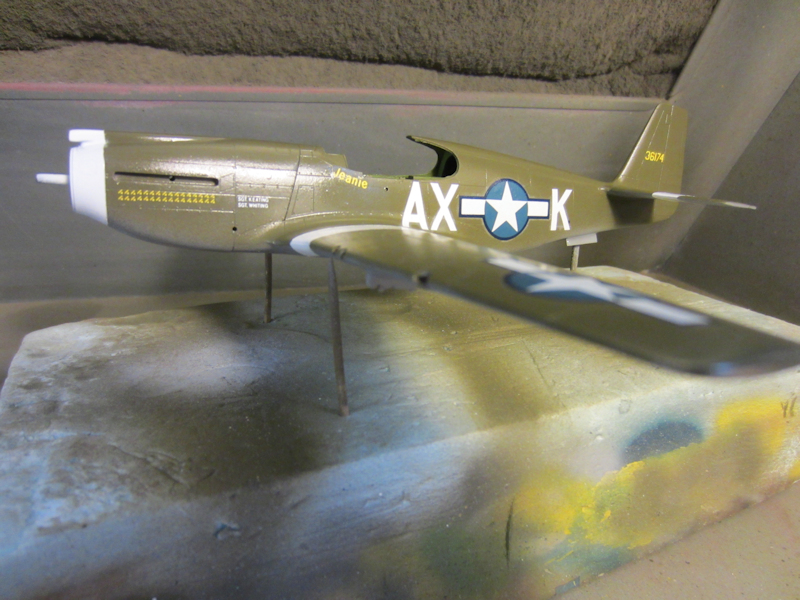
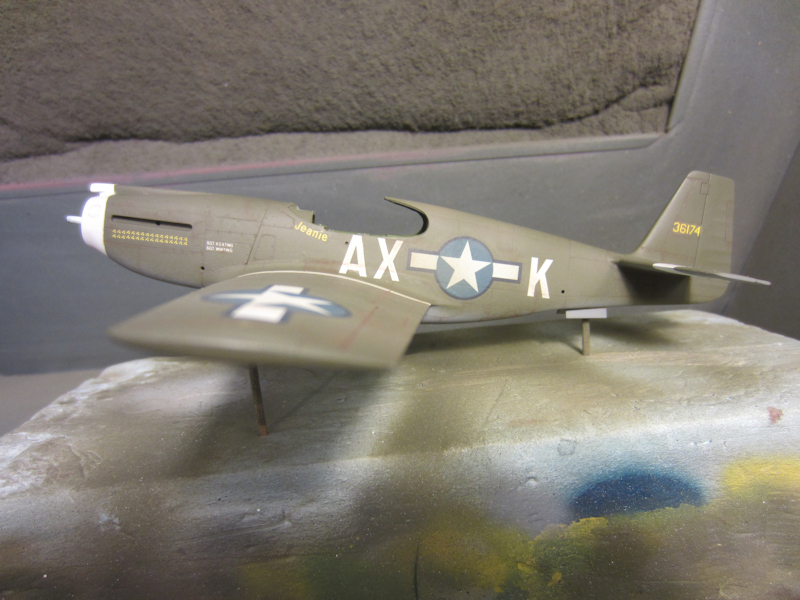
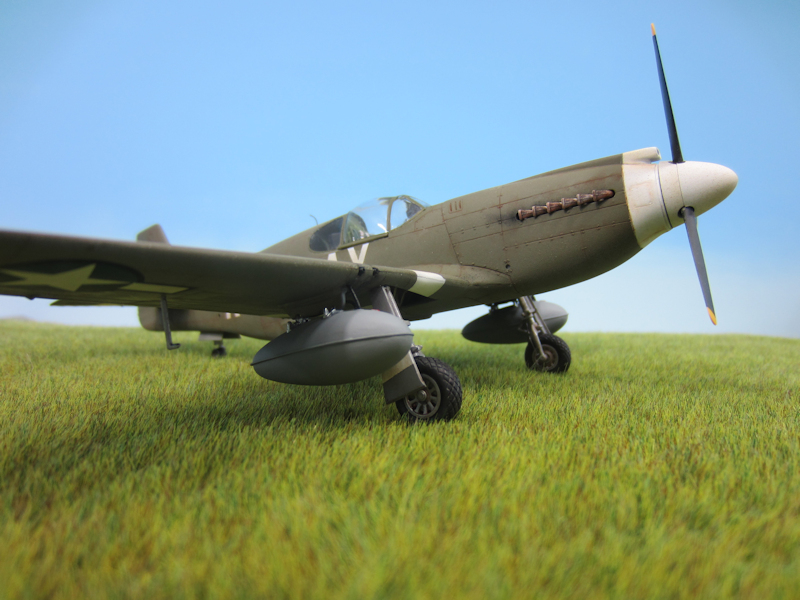
(14) These next four shots show the completed model. Part of what I’m
trying to do with this series of models is to show as many of the variations in the Mustangs
as I can. So, this model was built to show the Malcolm canopy. I also chose to paint the
external fuel tanks Neutral Gray. My research suggests that the tanks were either left in a
natural metal color or were painted gray. My P-51A included silver tanks, so I chose to make these
gray. |
 |
(15) |
 |
(16) |
 |
(17) |
|
[home]
[trek]
[space]
[camel]
[p-51]
[vega]
[C&O]
[professional]
|