
Tamiya 1:48 F-6D Mustang
|
Larry Z. Daily’s Personal Page Tamiya 1:48 F-6D Mustang |
This is the eleventh build in my Mustang
series. I didn’t originally intend to model more than one F-6, but the more that I thought about it, the more I convinced myself
that the collection — which is intended to model an example of each version of the Mustang flown by the U.S. in World War II —
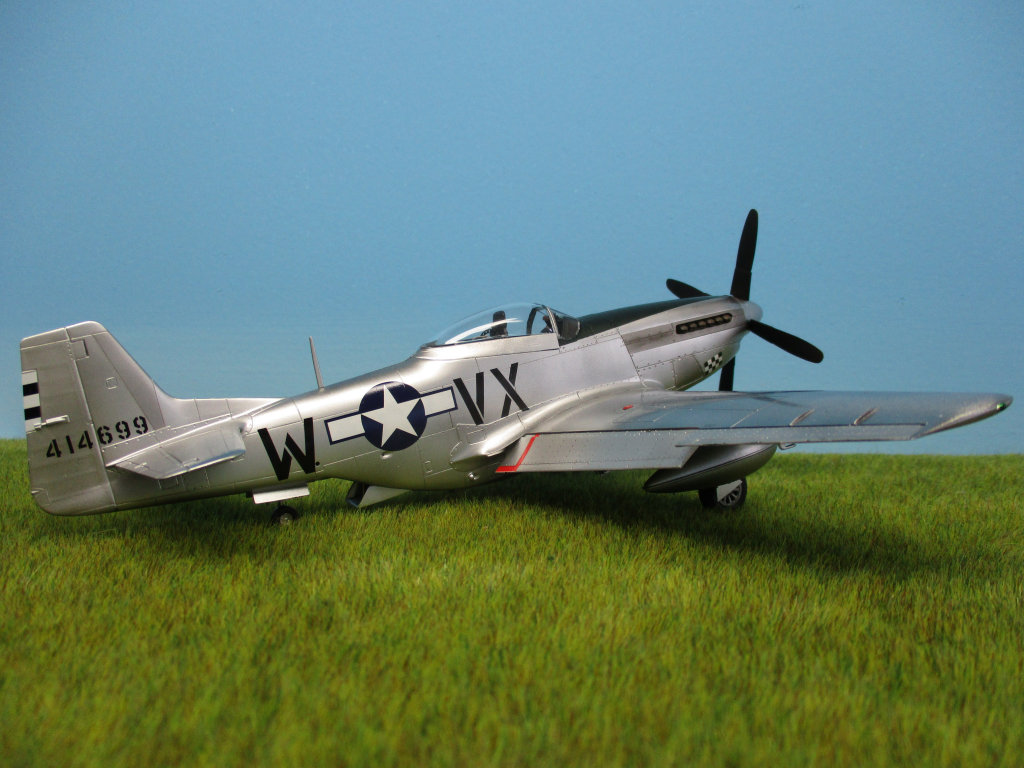
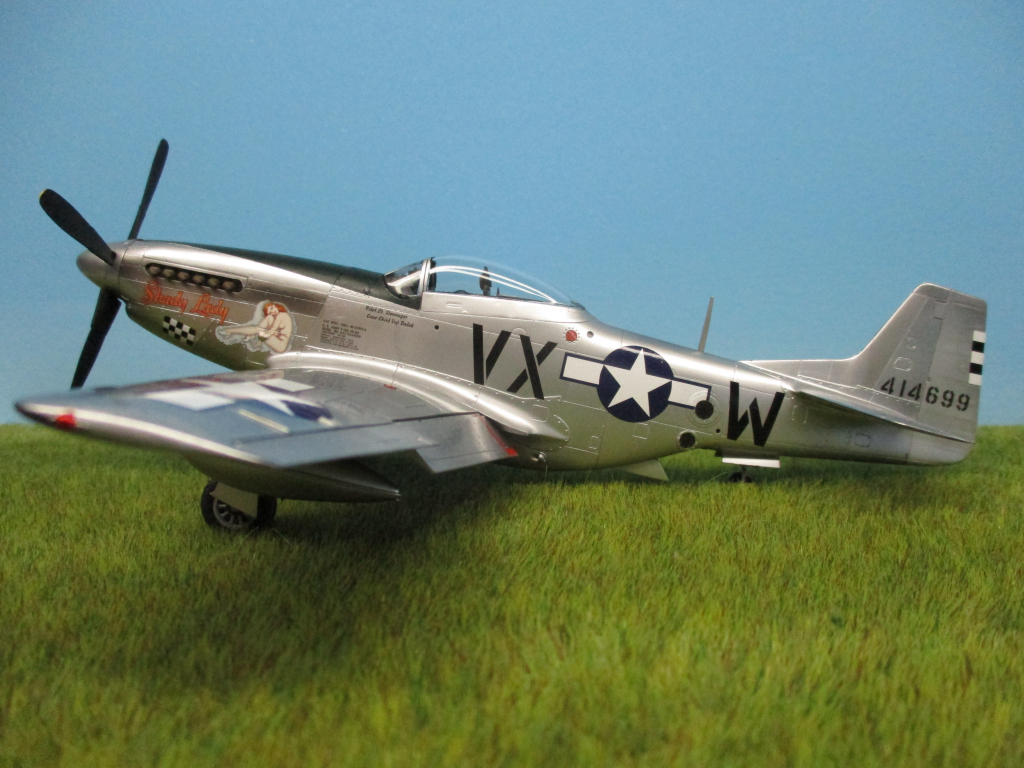
wouldn’t be complete without the F-6 variants. For the F-6D, I chose to model aircraft serial number 44-14699, nicknamed Shady
Lady. The aircraft was flown by Lt. Slonneger, assigned to the 109th TRS 67th TRG and was coded VX-W. The BuildPrototype:Model: F-6D (converted from a P-51D) Serial number: 44-14699 Nickname: Shady Lady Pilot: Lt. Slonneger Kit: Tamiya 1:48 P-51D Mustang In addition to the kit, I also planned to use the following aftermarket parts:
|
 |
(1) I had originally planned to use the True Details cockpit on this
build. I’ve built quite a few Mustangs, however, and at this point I have lots
of extra bits and bobs laying around. As I studied all of the stuff available in my
parts box, I ended up deciding to use a mix of A.M.U.R., Eduard, and True Details
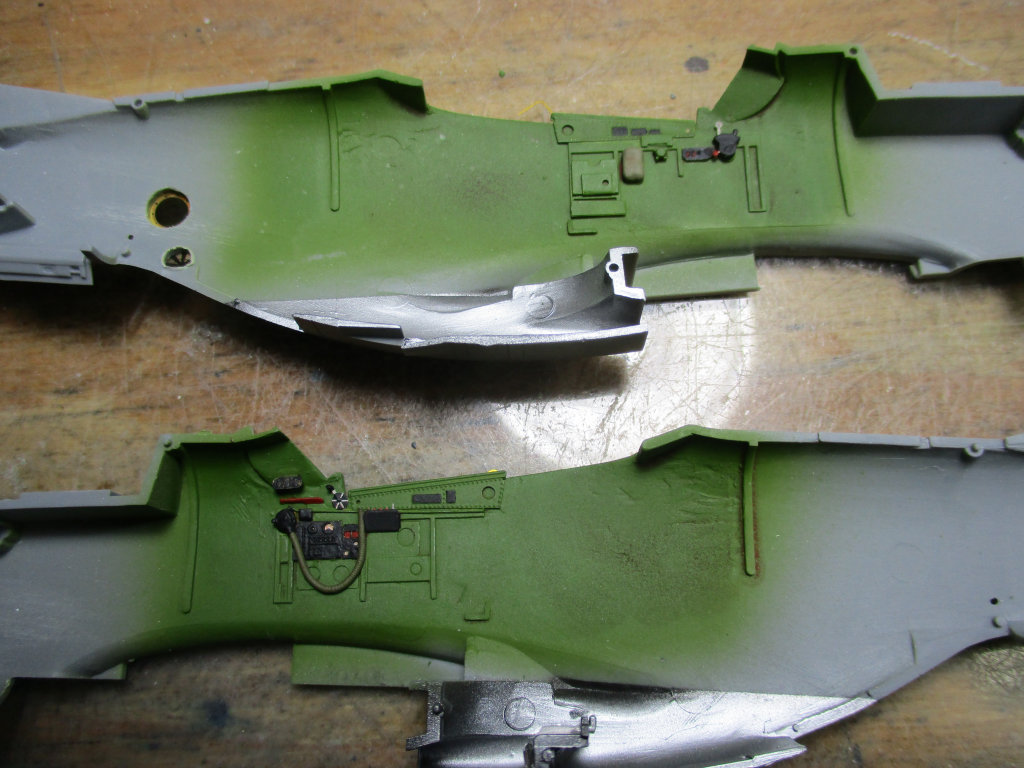
parts. Here are the cockpit sidewalls after detailing, painting, and weathering. |
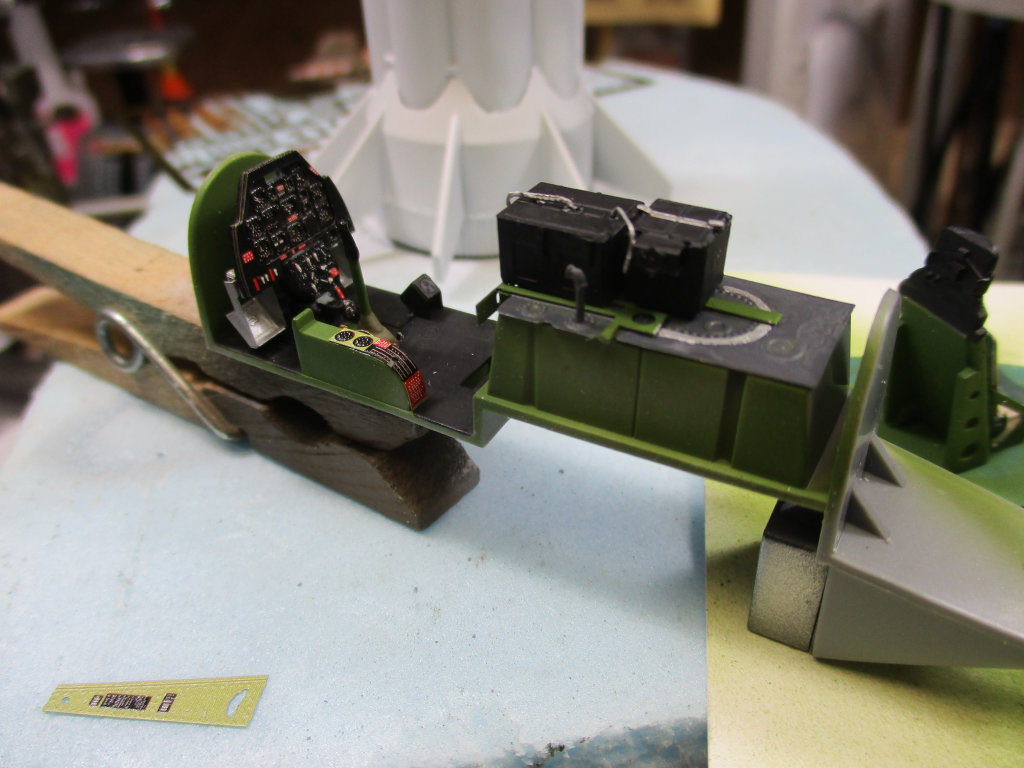 |
(2) The A.M.U.R. Reaver detail set provided the
top of the fuel tank, the battery, and the radio set. The IP and other
details came from the Eduard set. |
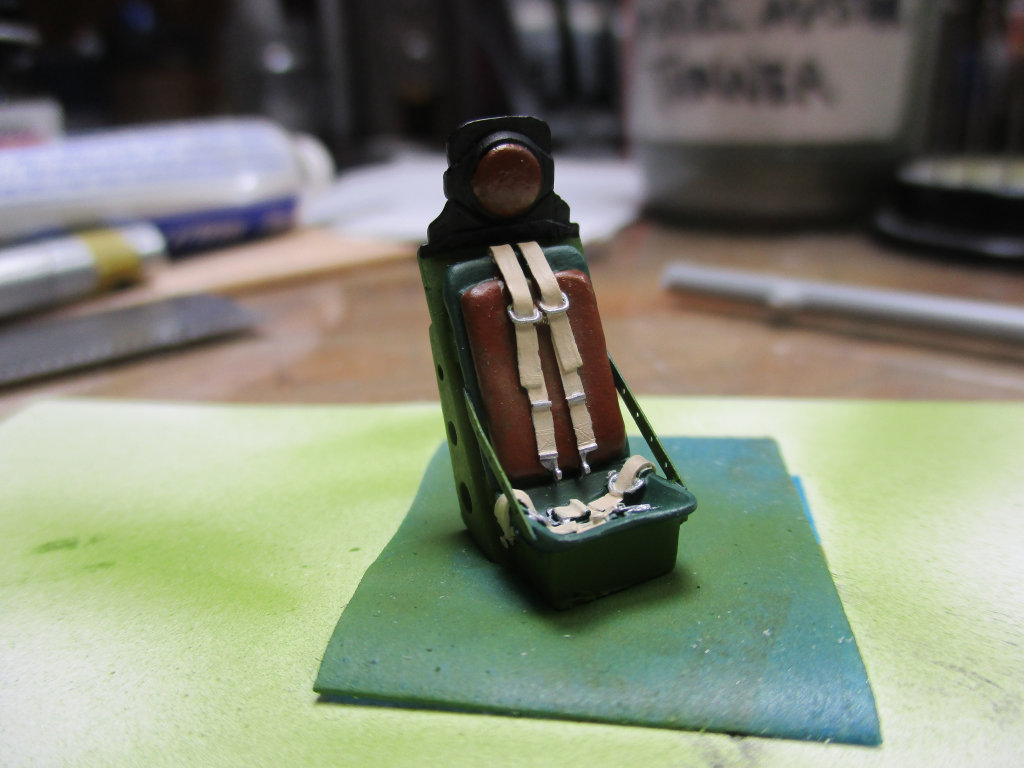 |
(3) I really love the True Details seat. |
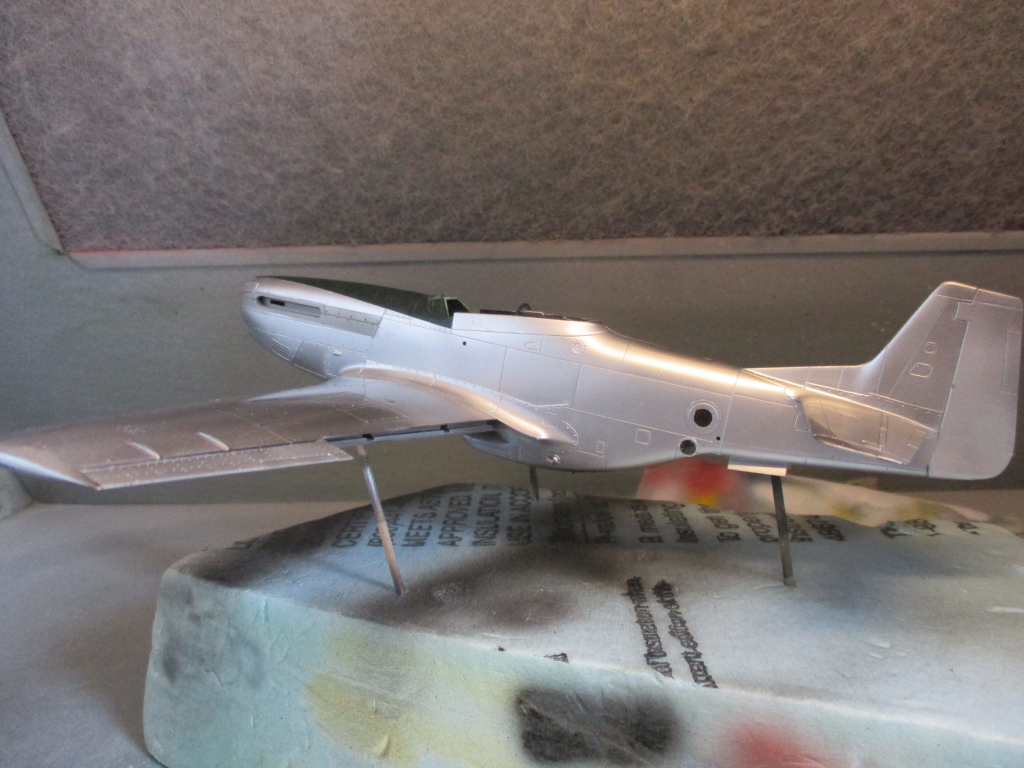 |
(4) In this shot, the main fuselage painting is pretty much done. I puttied
and sanded the unneeded panel lines on the wings along with the seams where the
fuselage halves came together. Then I hit the model with a coat of Alclad II Black
Primer. After another round of sanding and another coat of primer, I masked and painted
the control surfaces with Alclad II Semi-matte Aluminum. After that was thoroughly dry,
I masked the fuselage and control surfaces and sprayed the wings with Mr. Color Super
Silver. Once the wings had had several days to dry, I masked and painted the anti-glare
panel in front of the cockpit using Vallejo Olive Green. Next, I used a mix of Alclad II
Magnesium and Aluminum for the darker metal around the exhausts. Then the rest of the
fuselage received a coat of Alclad II Aluminum, with some panels misted with Dark Aluminum. |
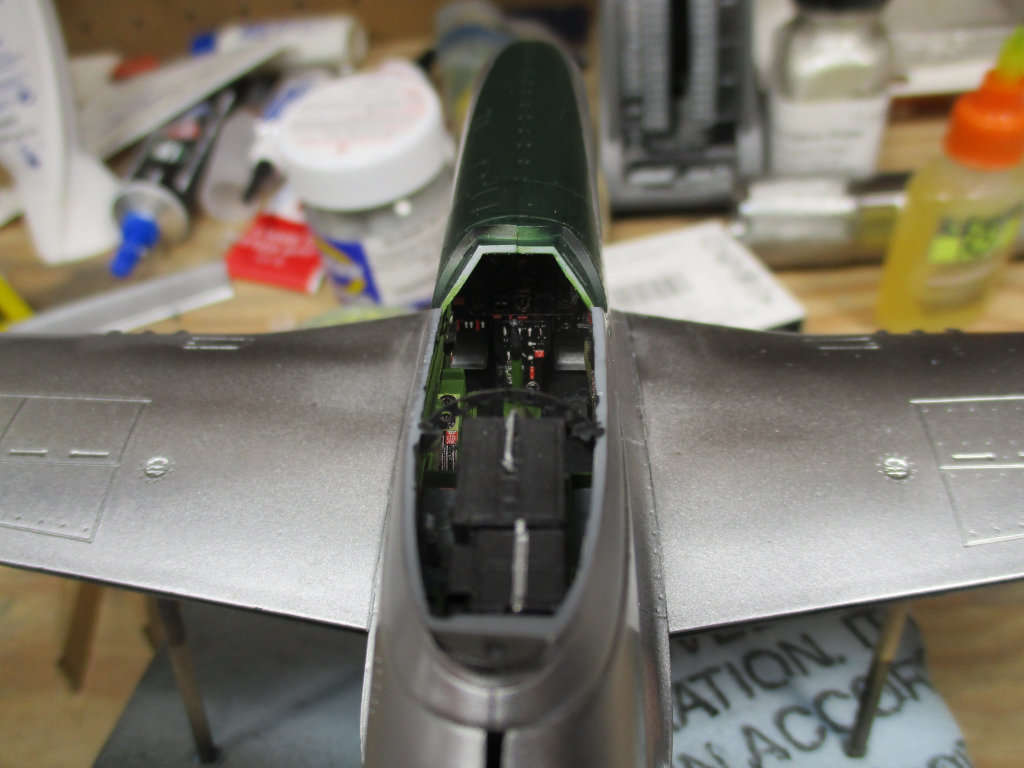 |
(5) One last view into the cockpit. In this photo, I
haven’t installed the seat yet, but will soon. |
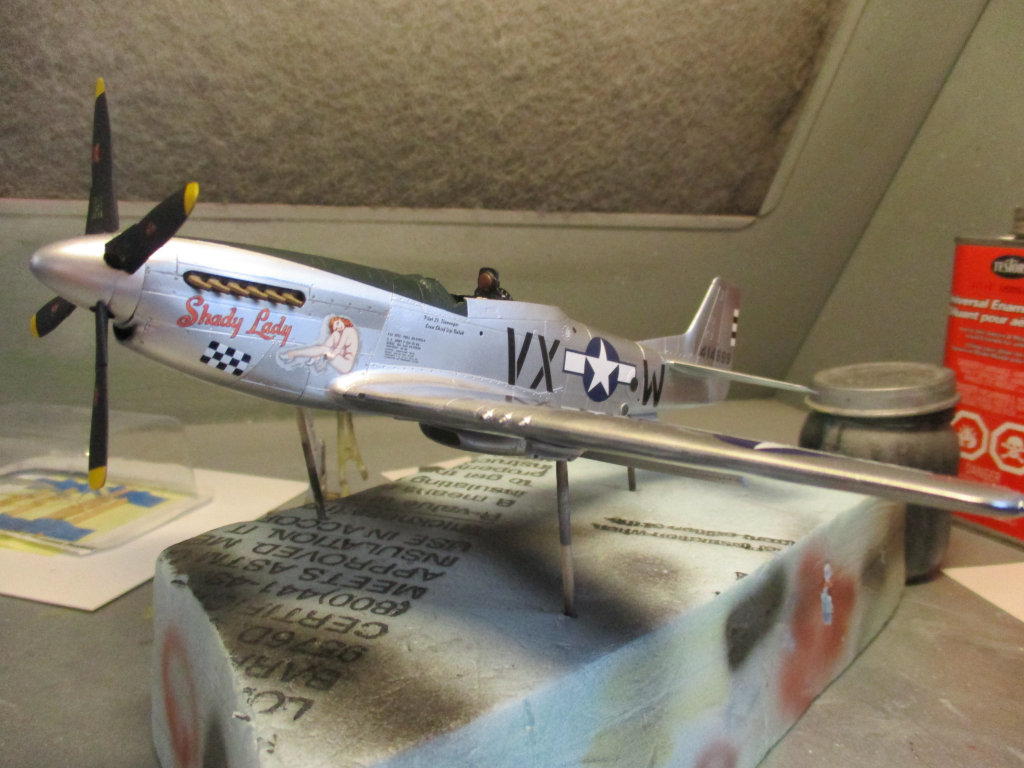 |
(6) Shady Lady near completion. I’ve added
the UltraCast prop and spinner, unshrouded exhausts, and the True Details
seat. The decals went on without a hitch, well, one hitch. There’s
some kind of raised vent cast onto the Tamiya fuselage right where the Lady
herself was to sit (it’s not there on the prototype). I didn’t
really notice it until the decal was going on and by then it was far too late.
I had to do some persuading with a brand new #11 blade and a fair bit of Walthers
Solvaset to get her settled down. I don’t think it’s too noticeable,
but if you model Shady Lady remove that vent before painting. |
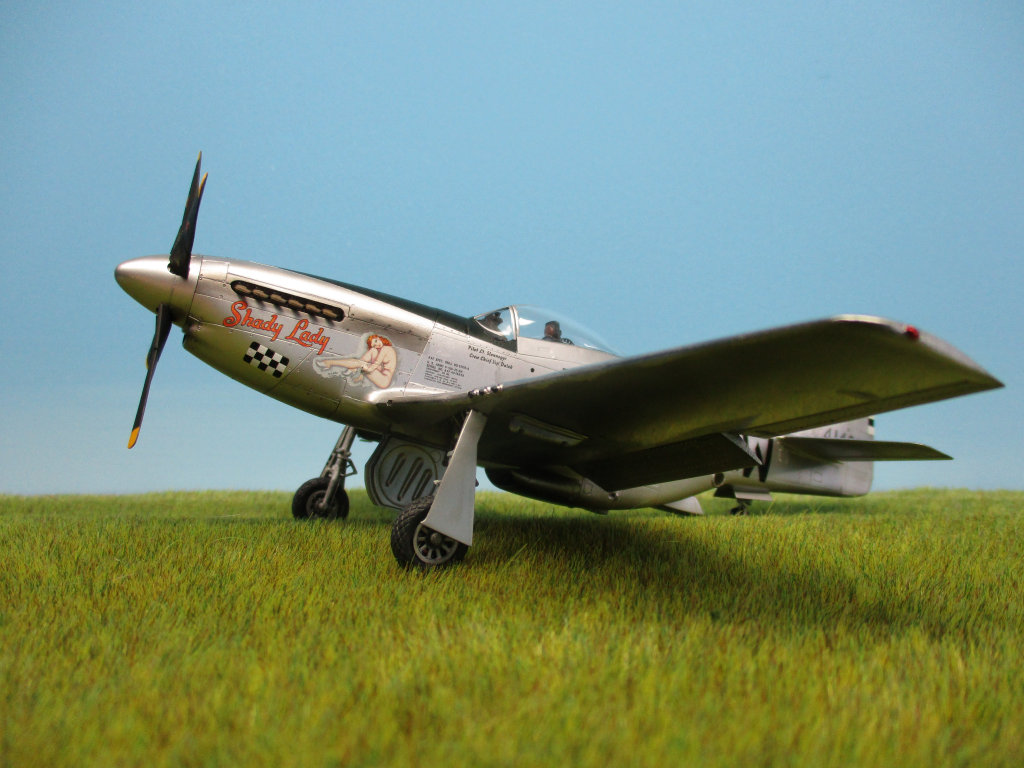 |
(7) Shady Lady is done. None of the photos that I’ve
seen of this aircraft showed drop tanks under the wings, so I might just leave them
off. I haven’t decided, though, whether I’ll add thme and, if I do,
whether I’d use the teardrop shaped 75 gallon tanks or the 108 gallon paper ones. |
 |
(8) The ports for the cameras are visble at the rear of the fuselage. |
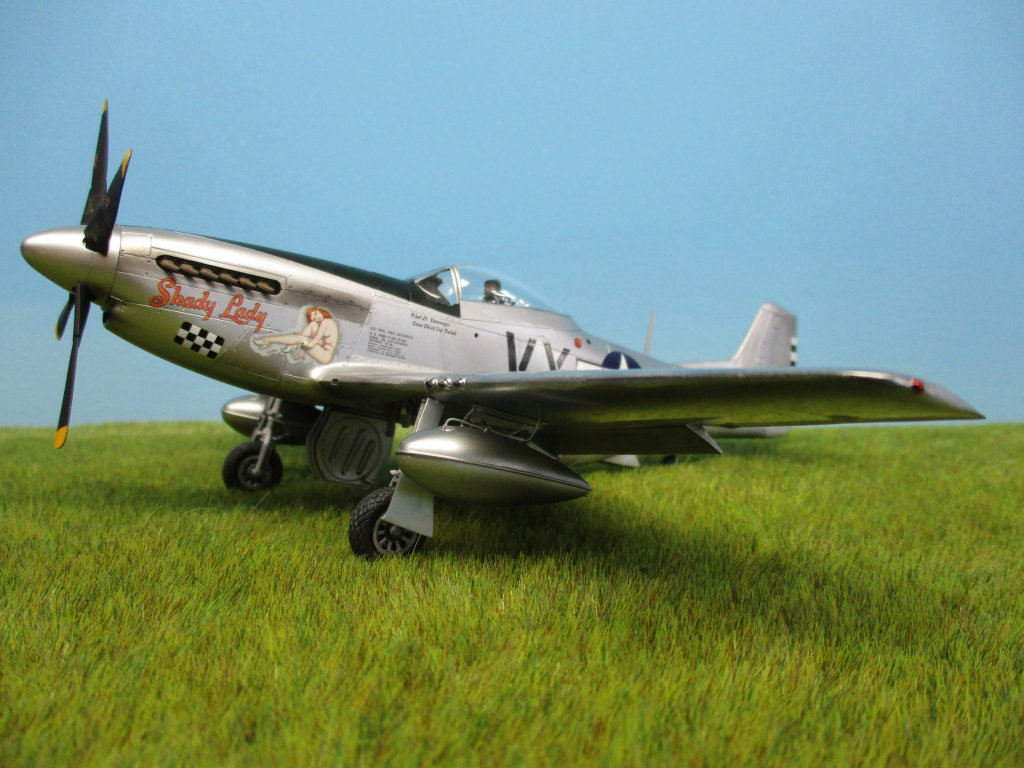 |
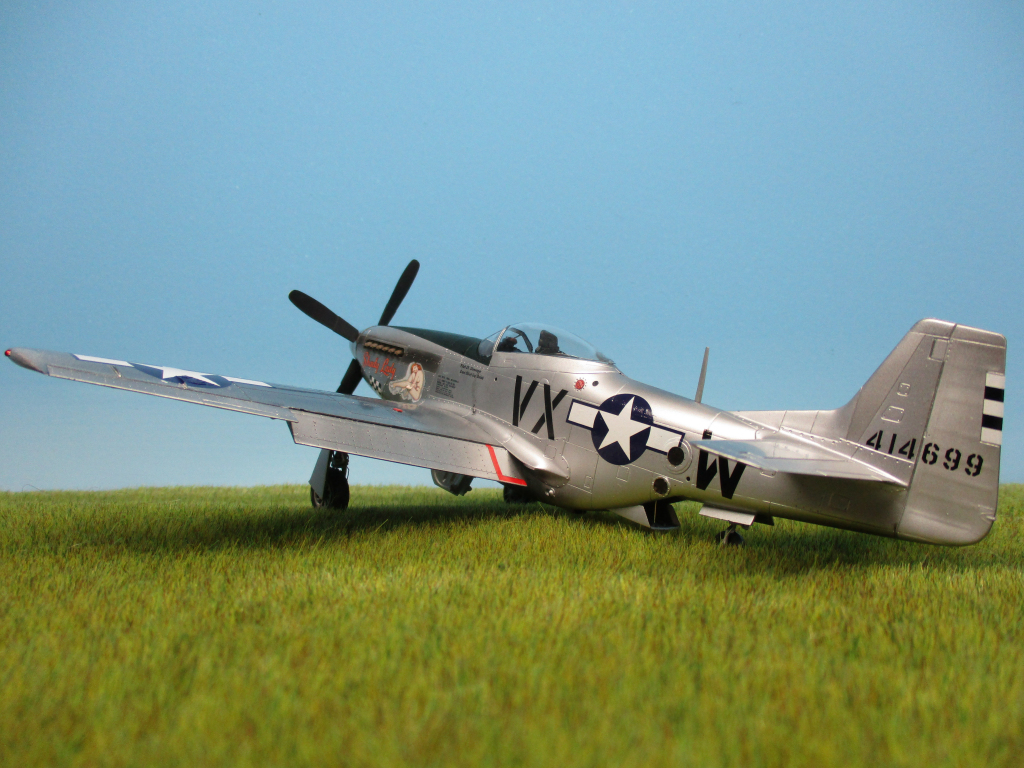
(9) As you can see, I decided on the 75 gallon tanks. These are Eduard Brassin
parts. I modified the attachment points to make the tanks a bit more secure. |
 |
(10) |
 |
(11) I used Tamiya soot-colored weathering powder to add some
subtle stains behind the exhausts and the guns. |
 |
(12) |
|
[home]
[trek]
[space]
[camel]
[p-51]
[vega]
[C&O]
[professional]
|