
Tamiya 1:48 P-51B Mustang
|
Larry Z. Daily’s Personal Page Tamiya 1:48 P-51B Mustang |
| This model — a Tamiya P-51B — is the seventh in my
Mustang
series. The desire to build this model (and the other P-51B that I built earlier) triggered my Mustang series. The first model
that I ever painted with an airbrush was Monogram’s venerable P-51B. It was decorated as James Howard’s Ding Hao.
Many years later I built a second Monogram P-51B and marked it as Nicholas Megura’s Ill Wind?. By 2014, both of
those models were showing their age and, since both my model building and airbrushing skills have somewhat improved since I built
them, I decided to replace them. One thing led to another, and now, once I’ve finished the series, I will have built 11
Mustangs. This one will be my first build of a Tamiya Mustang kit and only my second Tamiya kit that I’ve ever built. I
plan to mark it as Ding Hao using Mike Grant decals. Before the US entered World War II, Howard had flown against the
Japanese with the American Volunteer Group, the famous Flying Tigers. The AVG was disbanded after the US entered the war, and
Howard ended up in Europe, where he was commander of the 356th Fighter Squadron, 354th Fighter Group of the Eighth Air Force.
On 11 January, 1944, Howard led a group of fighters that were escorting B-17 Flying Fortresses on a bombing raid into Germany.
When German fighters attacked, Howard became separated from the rest of his group, but returned to the bombers, which were
being attacked by more than 30 German fighters. Howard attacked the German fighters on his own and downed two, possibly downed
another two, and damaged several others. As a result of his single-handed defense of the bombers, Howard was awarded the Medal
of Honor, the only ETO pilot to be so honored. Prototype: Model: P-51B-5-NA Serial number: 43-6315 Nickname: Ding Hao! Pilot: James Howard Kit: Tamiya 1:48 P-51B Mustang In addition to the kit, I also plan to use the following aftermarket parts:
|
 |
(1) The most difficult part of this build was going to be the cockpit, so I decided to start there.
As with my other P-51B, I was planning to use the beautifully detailed Aires cockpit set and I’d seen cautions
online about the width of the Aires cockpit parts. That width, according to the authors of the sites I visited, meant
that you need to really thin the sidewalls and the sides of the fuselage before gluing it all together. One site
that I saw mentioned that, if you’re not careful to get the sidewalls thinned sufficiently, the fuselage will
end up too wide and forcing the wings on will elimate the dihedral. To avoid that, I sanded the parts and then dry
fit as much as I could. I did find, however, that simply removing the cast on detail in the Tamiya cockpit was enough;
I didn’t need to thin the plastic sidewalls. In this shot, I had finally gotten everything fitting just right.
|
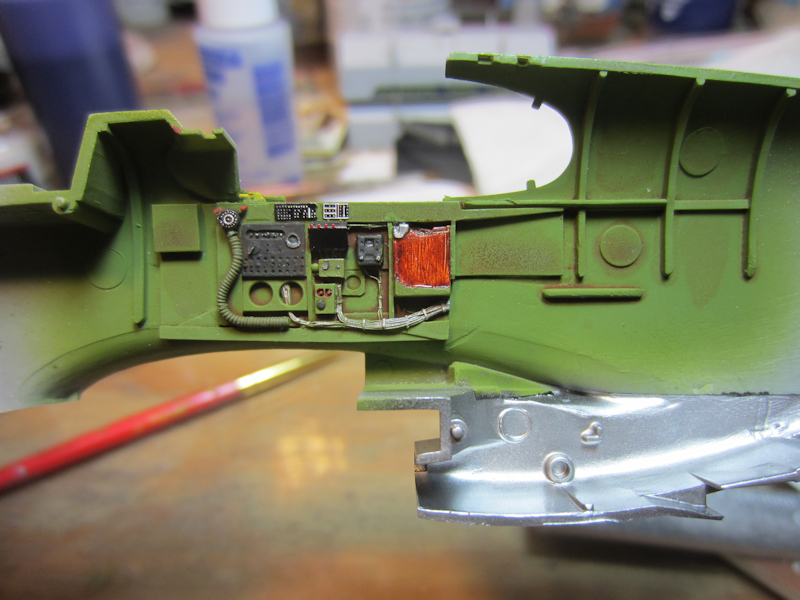 |
(2) Here’s the right side of the cockpit. |
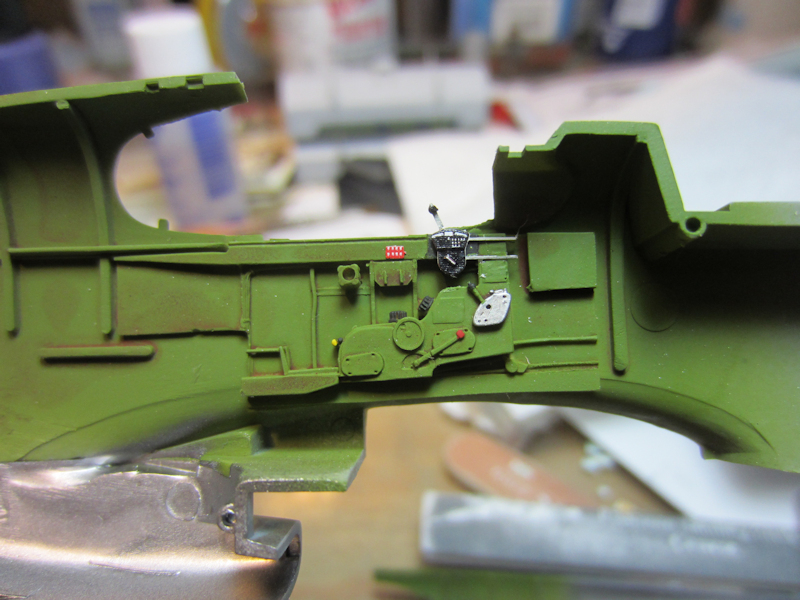 |
(3) And the left side. |
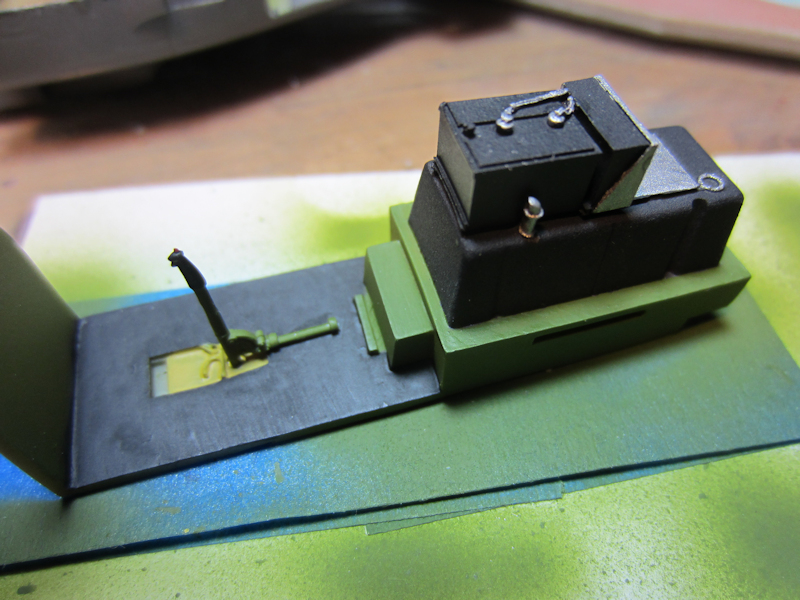 |
(4) Here’s the cockpit floor and the fuselage fuel tank. |
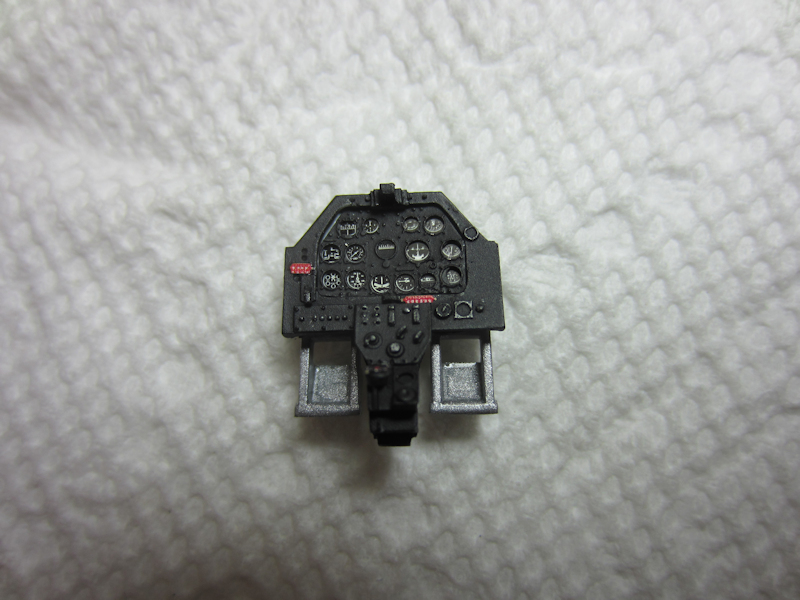 |
(5) The Aires instrument panel is a real jewel. I managed to mangle the photetch pedals, though,
so I went with the kit part. Once the fuselage is sealed up and the canopy is in place, the pedals aren’t
really visible. |
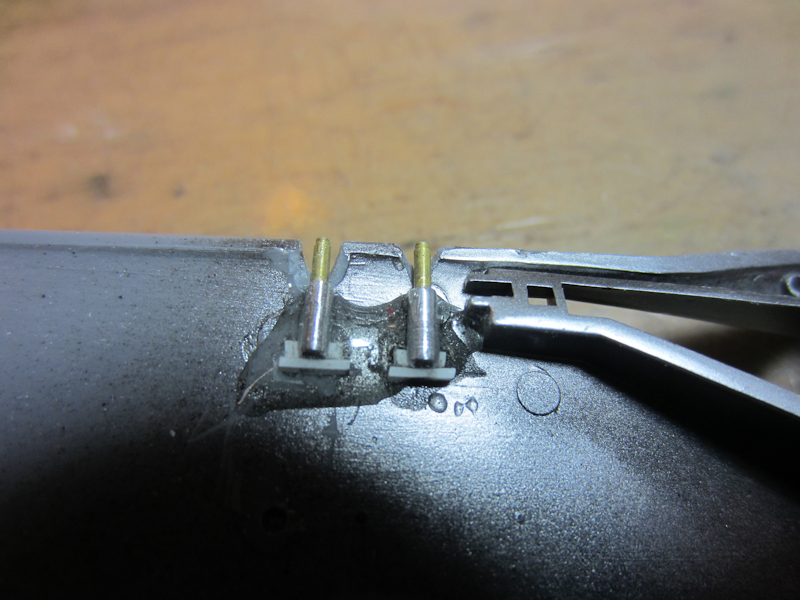 |
(6) I’ve made a couple of modifications to the wing. I carved off the cast on guns and replaced them with
nested tubing. The only measurements that I had to go by were the plastic gun barrels included in the Accurate Miniiatures kits,
so my replacements were based on those. The large portion at the rear is 1/16" aluminum tubing that I had on hand. The opening was
drilled out with a #61 drill to accept 1mm brass tubing with .8mm tubing nested inside that. I used 5 minute epoxy to hold them in
place. I used ACC on some earlier models and I had one of the barrels break loose and disappear inside the model, never to reappear.
That ain’t happening again. |
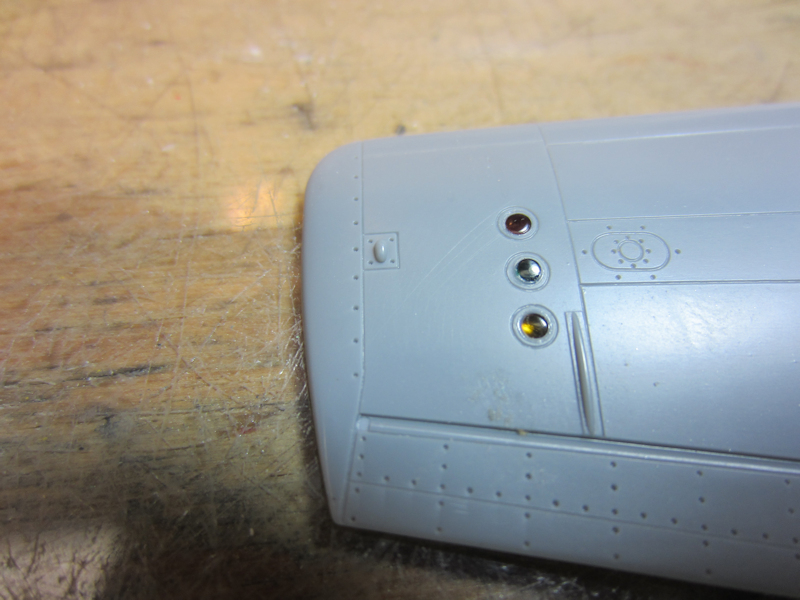 |
(7) I really like to drill out the formation lights and insert 1/16" clear styrene rod to represent the lenses.
I color them from the inside using Tamiya clear colors. |
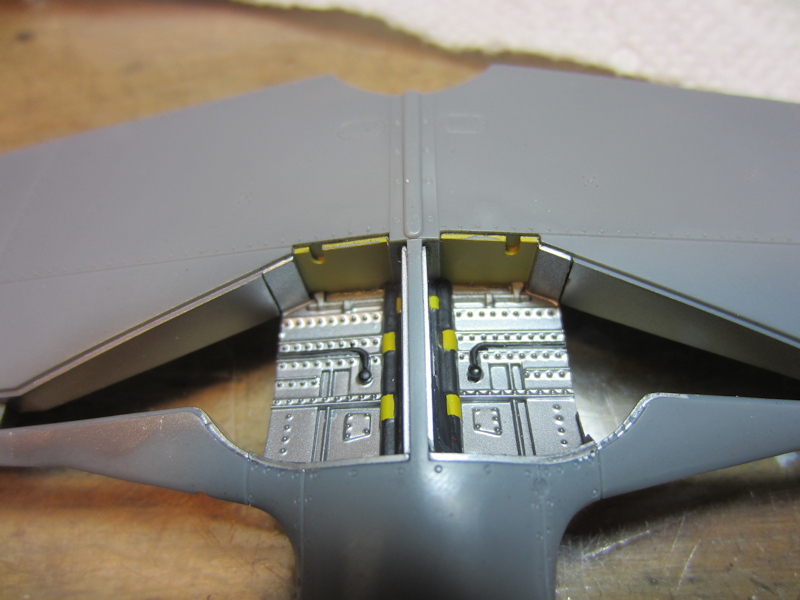 |
(8) Ok, so this really isn’t a modification. I painted the rear surface of the landing gear bay
with yellow zinc chromate, masked that off and painted the rest of the well with Alclad Aluminum. Then I picked out
some of the cast in detail with black, grimy black, and yellow. |
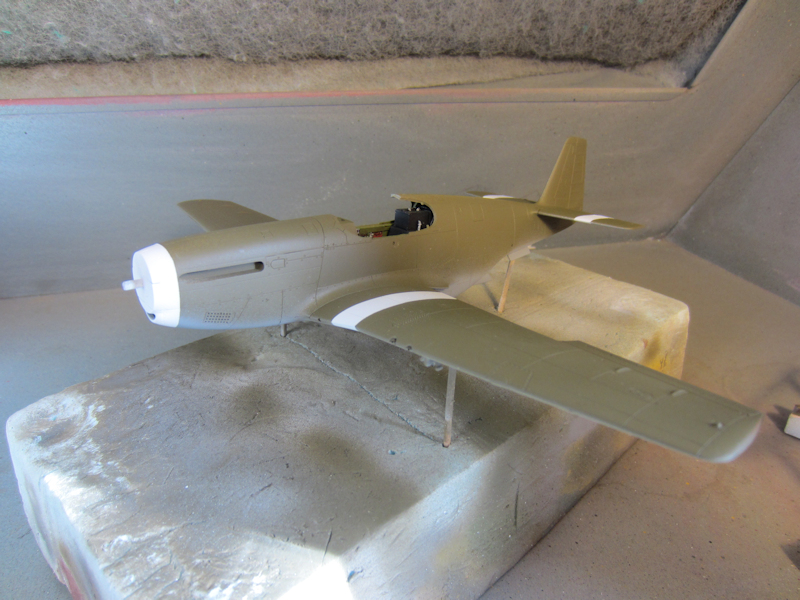 |
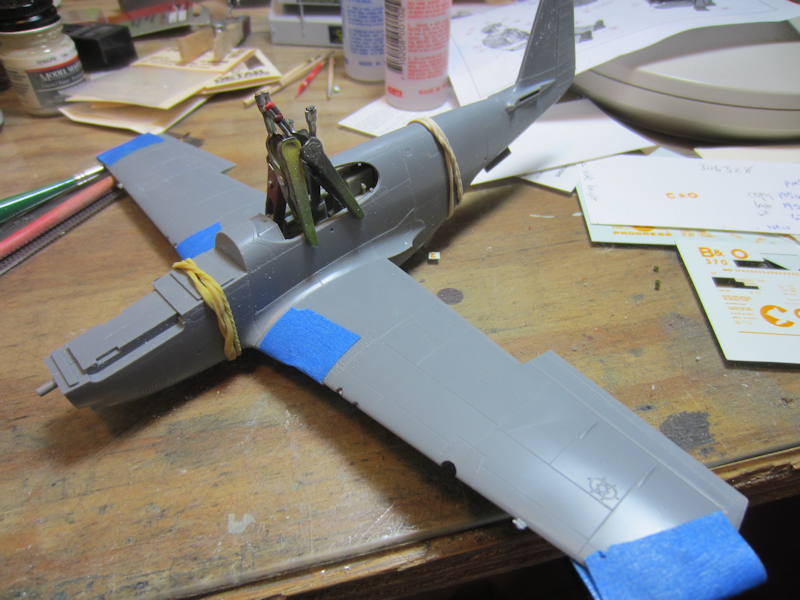
(9) Ding Hao after a quick trip to the paint booth for olive drab over neutral gray with a
white nose and ID stripes. |
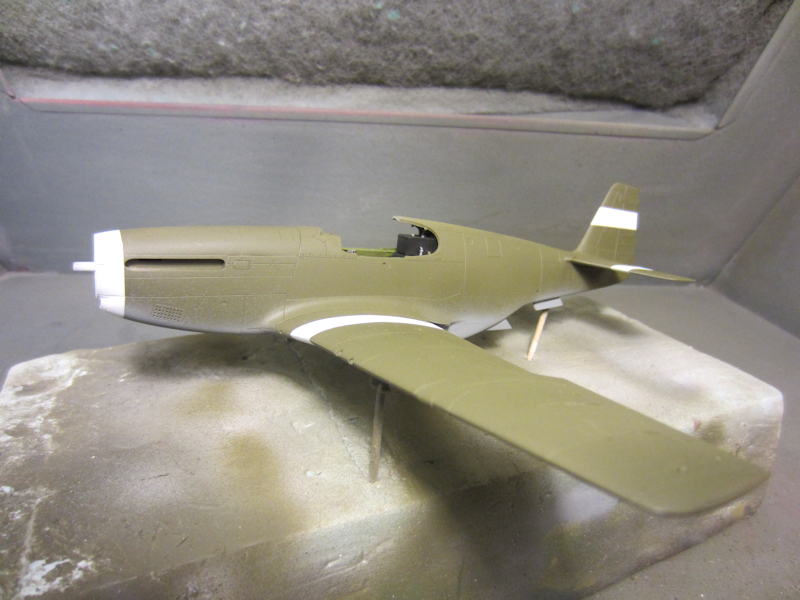 |
(10) Well, important lesson here. Keep reviewing your sources, even in the middle of building a model.
As I was preparing for this build, I looked at (more like misread) the Mike Grant decal sheet that I intended to use along with the prototype
photos that I could find of Ding Hao. I’d also read FSM’s American Fighters over Europe: Colors and
Markings of USAAF Fighters in WWII, so I knew that at some point, the white ID stripe on the vertical tail on the P-51’s
was painted over with olive drab. After all that, I managed to come up with the idea the vertical tail stripe on Ding Hao had been
painted over while it still had the standard P-51 canopy. This morning, though, I was looking over my source photos and something
bugged me in what I saw. I finally realized what it was: every photo I have of Ding Hao with the standard canopy had the
ID stripe, one with the Malcolm hood had the ID stripe, and all the rest with the Malcolm hood did not have the tail stripe. I did
a little more research online and, best I can tell, the ID stripe stayed on the aircraft until after it was fitted with the Malcolm
hood. At least I caught it before clear coating and decalling. |
 |
(11) The decals are on, sealed with another coat of Future, and then the whole plane was overcoated with
Model Masters flat clear. Once that’s had a day or so to dry, I’ll start the weathering process. |
 |
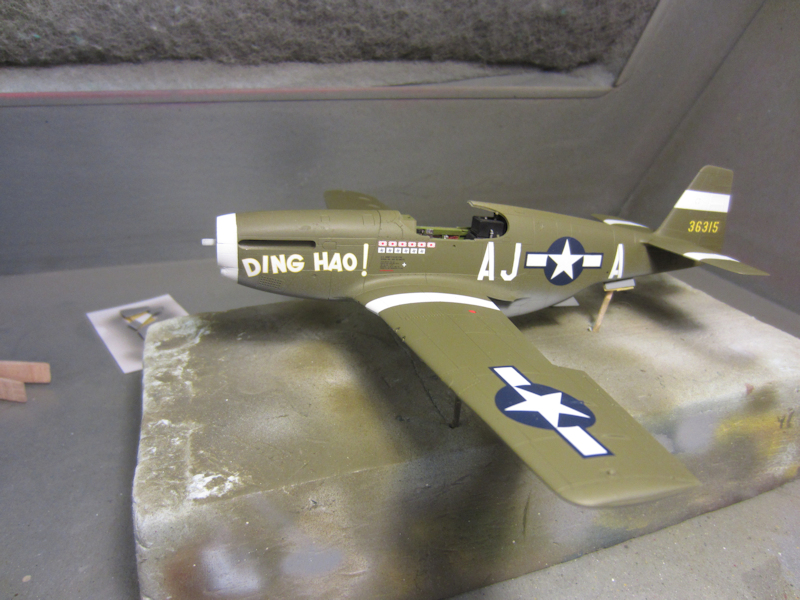
(12) Well, I had an issue after the flat clear coat. When I first applied the decals, everything was fine.
So, I sprayed a coat of Future over them. Everything was still fine. Right after I sprayed the flat coat, everything still
seemed fine, but a day or so later I noticed a problem. The space between the A and the J on the starboard side of the
model had become Silver City. It looked really bad. I’m not sure what happened; all the other decals still looked
great. Because the silvering was only visible under the clear film between the letters, I thought I could get away with
gently masking off the letters and spraying a light coat of olive drab over the silvered film. I’m sure that you
all know what’s coming next. That’s right. The lettering (or most of it) came off with the masking. I had used
Tamiya masking tape and only put enough pressure on it to keep it from falling off, but it pulled up the lettering anyway.
So, I used blue painter’s tape to pull up the rest of the letters and ordered another set of decals. I’ve got them
on, the plane is weathered and I’ve installed the landing gear. The only major stuff left is the canopy and the drop tanks. |
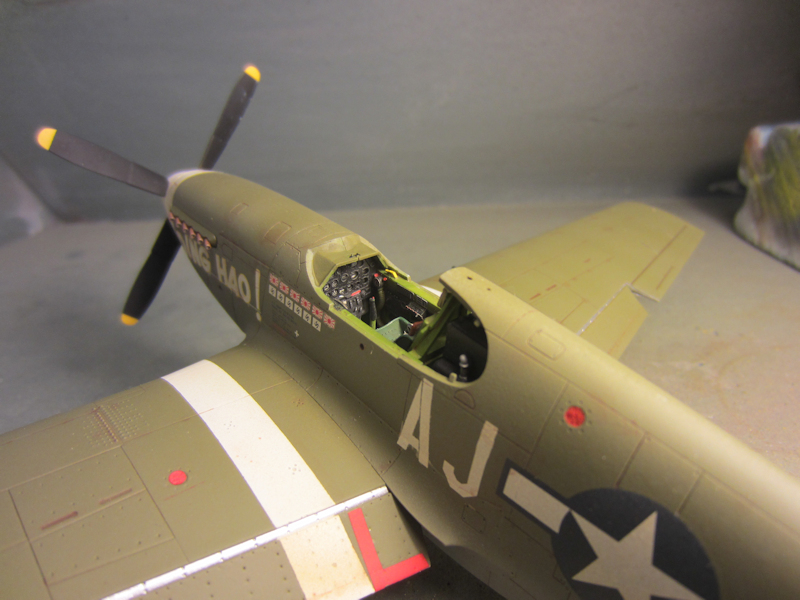 |
(13) Here’s a peek into the cockpit. I still have a few photoetch levers to install, but I’m
pretty pleased with how it came out. |
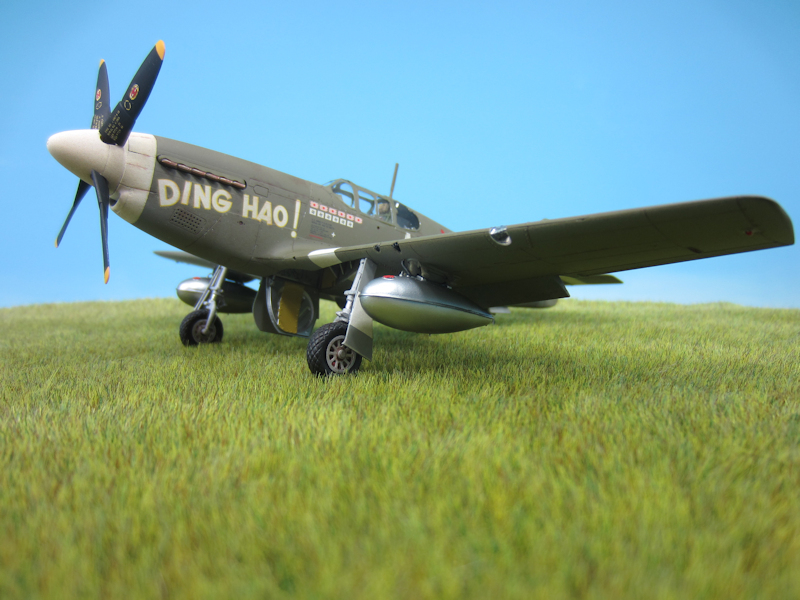 |
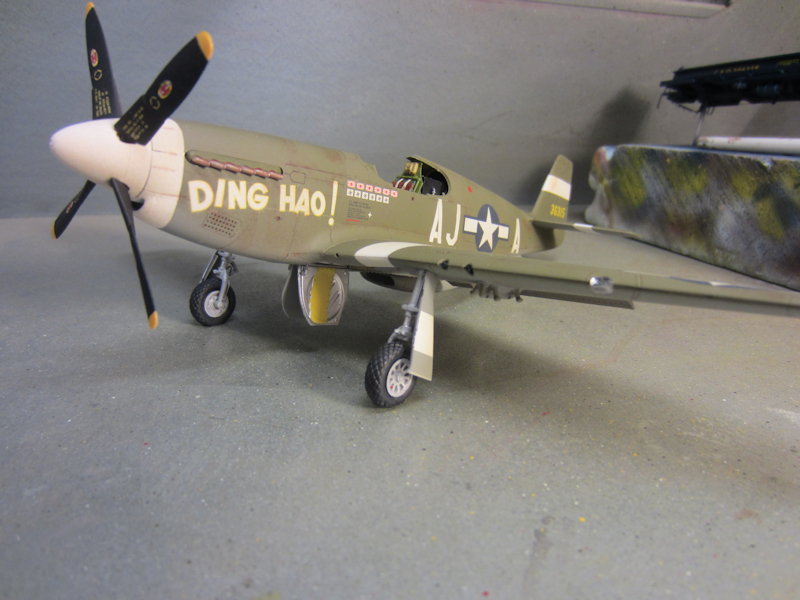
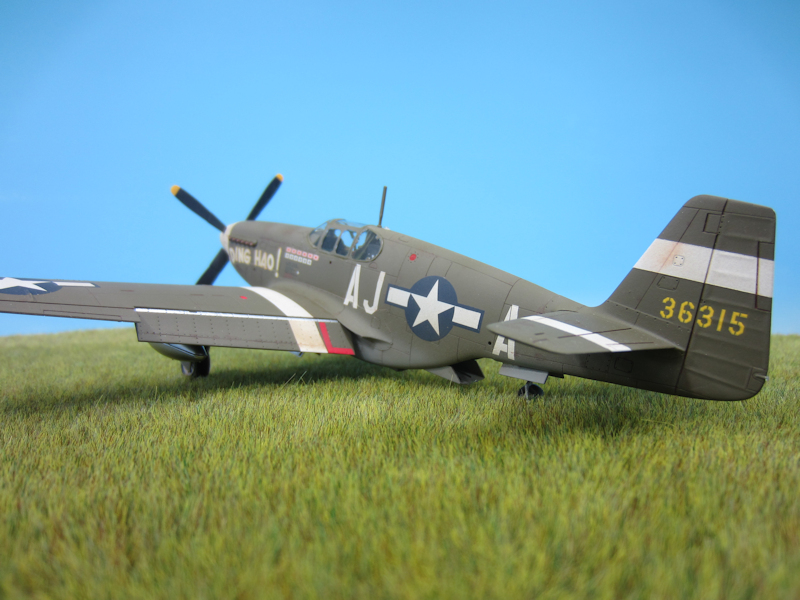
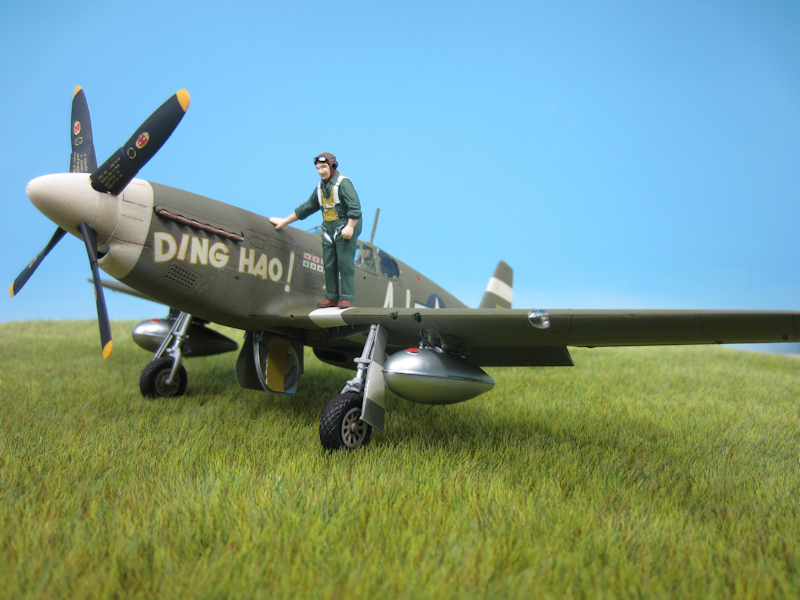
(14) Photos 14, 15, and 16 show the completed model. |
 |
(15) |
 |
(16) |
|
[home]
[trek]
[space]
[camel]
[p-51]
[vega]
[C&O]
[professional]
|