
Accurate Miniatures 1:48 F-6A Photo Reconnaissance Mustang
|
Larry Z. Daily’s Personal Page Accurate Miniatures 1:48 F-6A Photo Reconnaissance Mustang |
| This model is the fourth in my Mustang
series. This build is an Accurate Miniatures F-6A. The F-6A was simply a P-51 with a camera installed behind the pilot’s seat. I plan to use the kit decals, mostly because I could only find one aftermarket decal set for an F-6A and the markings in that set weren’t as interesting as the ones that came in the kit. The markings are for F-6A serial number 41-37365 which assigned to the 111th Tactical Reconnaissance Squadron, 69th Tactical Reconnaissance Group. The 111th was an activated Texas National Guard unit and in 1943, the squadron flew out of Berteaux Aerodrome in Algeria. Prototype: Model: F-6A Serial number: 41-37365 Nickname: none Pilot: Cpt. Dave Harrell Kit: Accurate Miniatures 1:48 F-6A Mustang In addition to the kit, I also used the following aftermarket parts:
|
 |
(1) The kit and all the aftermarket goodies that I plan to use. |
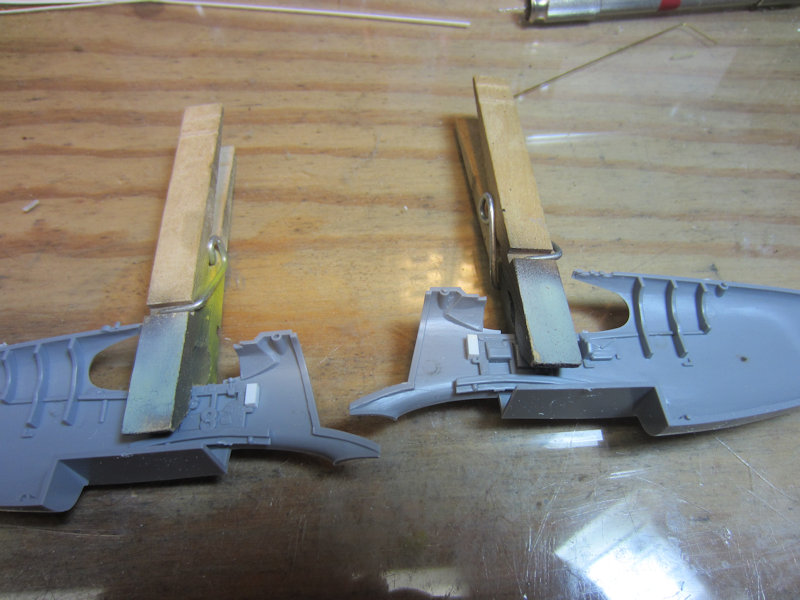 |
(2) In the past, I’ve struggled to get the sidewall detail for the
cockpit lined up correctly. No matter how careful I was, I ended up with alignment issues.
To address the problem, I clamped the kit part in place and attached a piece of scrap styrene
strip using white glue. I located it right where the locator nub for the instrument panel
protrudes from the front of the piece. I also scribed around the part toward the aft end to
help line up the back end of the piece. |
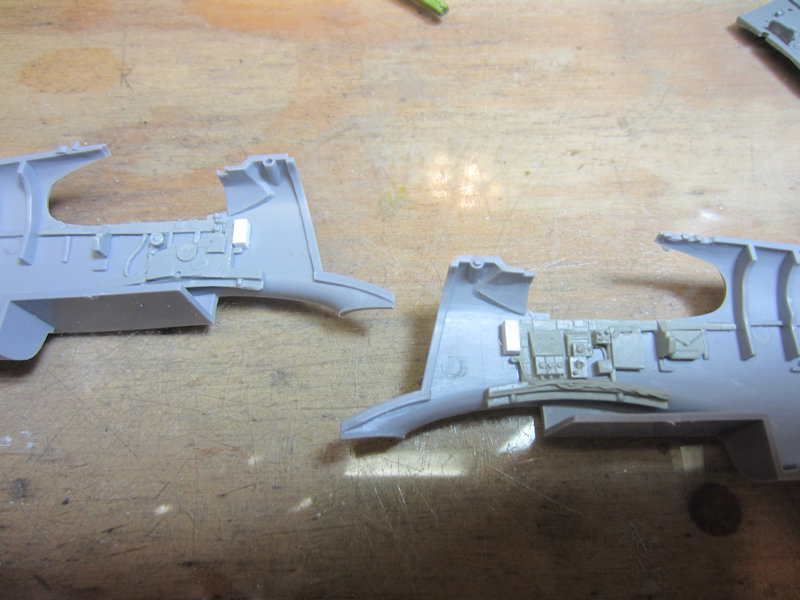 |
(3) Next, I attached the True Details part with ACC, making sure to snug it up
against my temporary locator and my other markings. Once the ACC cured, I was able to easily
remove the locator, since I had only attached it with white glue. Dry fitting the rest of the
parts shows that I cured my alignment issues. |
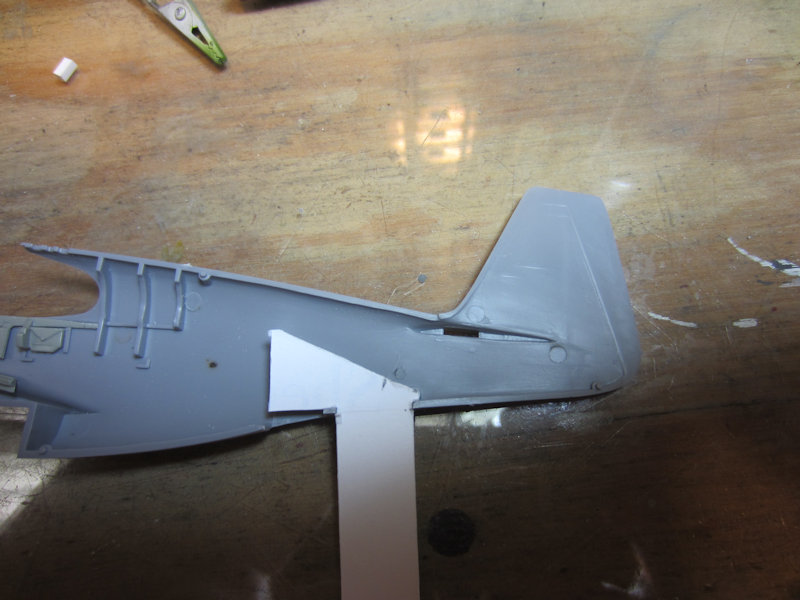 |
(4) As with my other Accurate Miniatures P-51 builds, I planned to use the Scale
Aircraft Conversions landing gear. Those parts were designed for the Tamiya P-51. To use them —
especially the tail wheel — I had to replicate the Tamiya mounting system. I started by cutting
one of my old business cards into a template (if I had realized how much use this template was going to
get, I would have made it out of sheet styrene). Then I used the point of a pin to scribe the correct
angle into the inside of the fuselage. The pencil mark on the template marks the front edge of the
mounting bracket. |
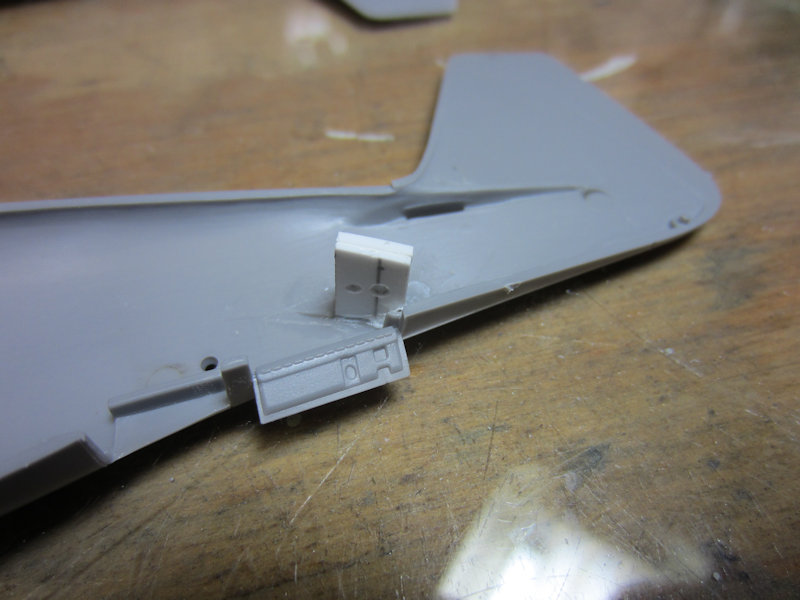 |
(5) Here’s the new mount in the fuselage. Dimensions for the parts can be found on
the page for my
P-51 build. |
 |
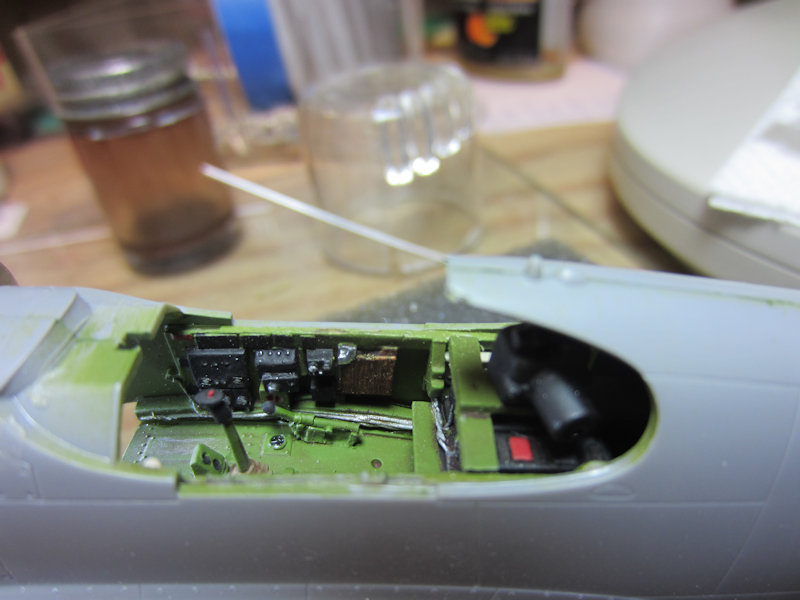
(6) Here are the True Details cockpit sidewalls added to the fuselage. The basic color is
Model Masters Interior Green with details picked out in black, red, and white. In prior builds, I used
decals for the cockpit stenciling, but once you close up the early Mustangs by installing the canopy, you
really can’t see much. For this build I opted to just paint the stencil locations with black paint. |
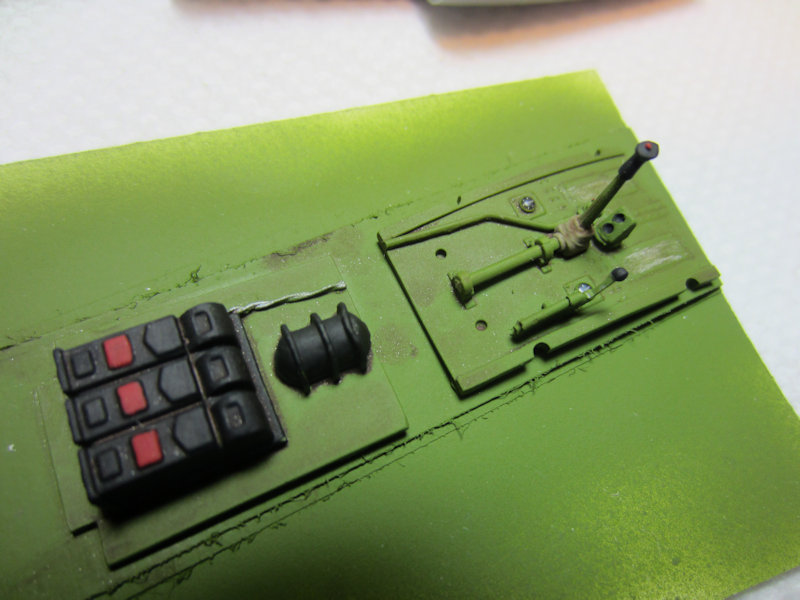 |
(7) Here are the rest of the True Details cockpit parts. I weathered everything with a wash
made of burnt umber oil paint thinned with Turpenoid. |
 |
(8) In this shot I’ve closed up the fuselage. One important tip if you decide to build an
F-6: don’t install the camera until after painting the fuselage. It interferes with masking the cockpit. |
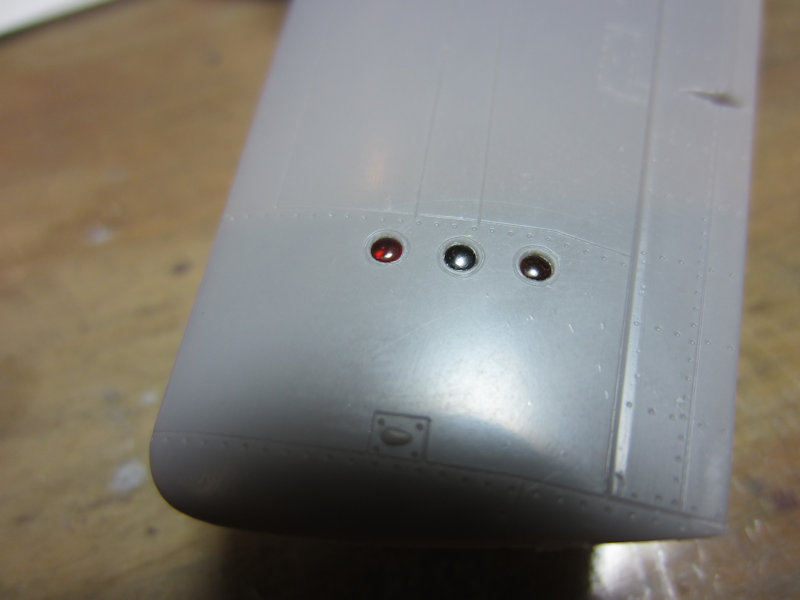 |
(9) As I have with my previous builds, I drilled out the formation lights on the wing using
a 1/16" drill bit. Then I cut three lengths of 1/16" clear styrene rod and polished one end of each. I used
Testors Liquid Cement to glue the rods into the holes in the wing with the polished ends flush with the surface
of the wing. After the cement dried, I cut the rods off flush with the inner surface of the wing and polished
the inside ends as well. Then I used (front to back) Tamiya clear red, green, and yellow paint to color the new
lenses. |
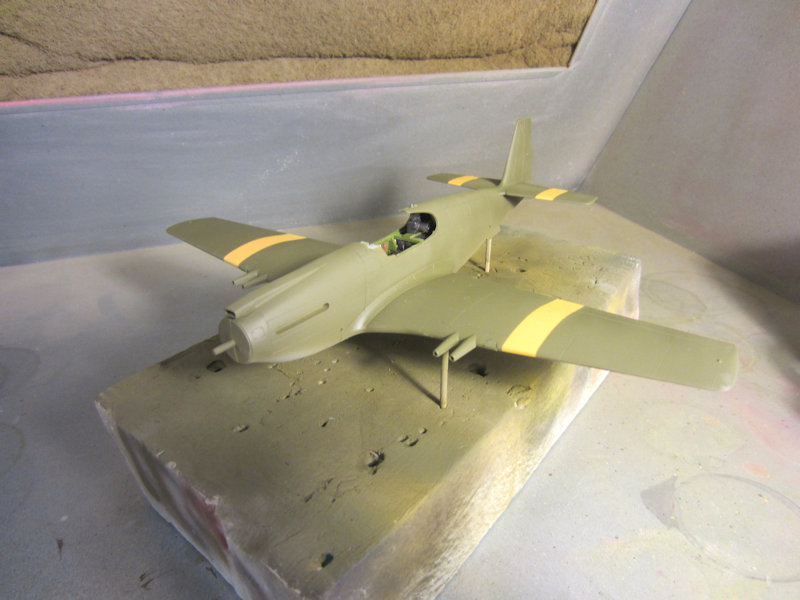 |
(10) This shot shows the aircraft after a quick visit to the spray booth. I first painted the
area where the stripes would be with Model Masters Insignia Yellow with just a drop or two of Insignia Red added.
Then I masked off the stripes and sprayed Model Masters Neutral Gray below and Olive Drab above. |
 |
(11) I followed up the Olive Drab and Neutral Gray with an overall gloss coat of
Future Floor Polish in preparation for decals. Once the decals were on and dry, I sealed them with
another coat of Future. That was followed by a coat of Model Masters Flat Clear. Weathering started
by flowing a wash of Burnt Umber oil paint thinned with turpenoid into the panel lines. A light misting
of Model Masters Afrika Khakibraun toned down the colors, tied everything together, and gave the model
a faded, well-used look. Then I added the landing gear (which in this shot still needs some weathering). |
 |
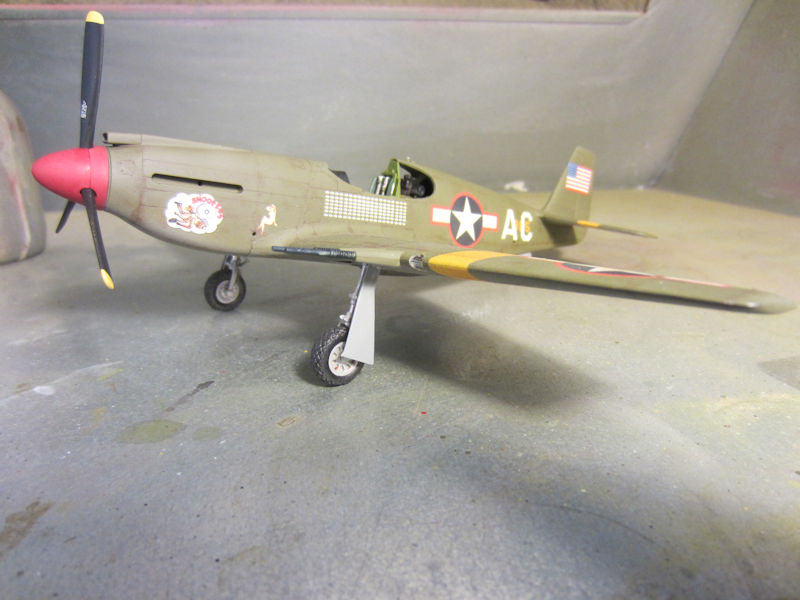
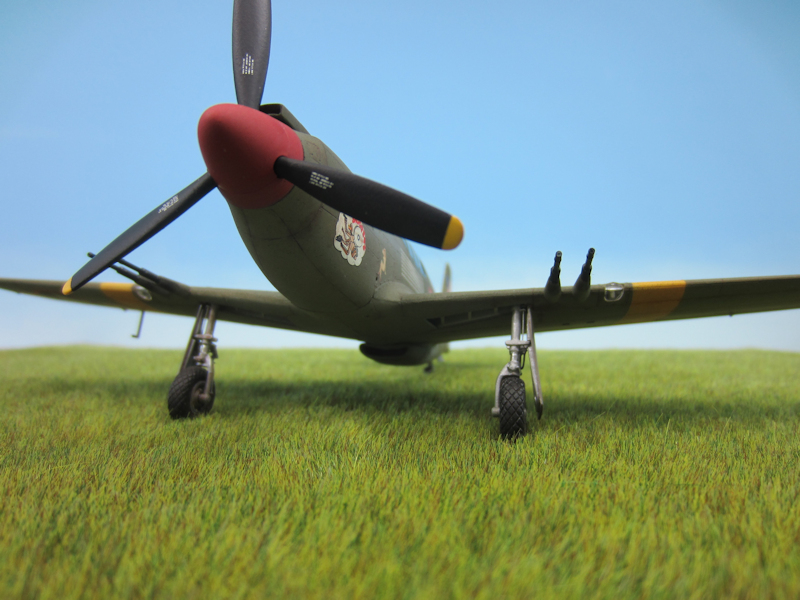
(12) These next few shots show the finished model. |
 |
(13) |
 |
(14) |
 |
(15) |
|
[home]
[trek]
[space]
[camel]
[p-51]
[vega]
[C&O]
[professional]
|