
Accurate Miniatures 1:48 P-51A Mustang
|
Larry Z. Daily’s Personal Page Accurate Miniatures 1:48 P-51A Mustang |
| This model is the third in my Mustang
series. This build is an Accurate Miniatures P-51A. The P-51A was the last Mustang variant powered by an Allison engine.
The U.S. originally placed an order for 1200 P-51A’s, but reduced the order to 310 after successful test flights of
a Merlin equipped Mustang. The British were given 50 of the P-51A’s, which they designated Mustang II. The U.S. P-51A’s
primarily saw service in India and China; some were even assigned to the Flying Tigers. I plan to use the kit decals for this build. The markings are for an aircraft flown by John J. England, who was with the 530th Fighter Squadron, 311th Fighter Group in Mohanbari, India in 1944. It was nicknamed Jackie after the pilot’s wife. I have my own reasons for wanting to model an aircraft nicknamed Jackie. Prototype: Model: P-51A-1-NA Serial number: 43-6077 Nickname: Jackie Pilot: Mj. John J. England Kit: Accurate Miniatures 1:48 P-51A Mustang In addition to the kit, I also used the following aftermarket parts:
|
 |
(1) I’ve built two other Accurate Miniatures Allison Mustangs. Rather than go through how I built
this model step by step, I’ll just refer you to the pages for my
Accurate Miniatures A-36 and my
Accurate Miniatures P-51
builds. What I want to do here is to show you what I did differently for this model. In those two previous builds, I struggled to get the
sidewall detail for the cockpit lined up correctly. My original method was to put the kit parts in place and then scribe around them. Then I’d
remove the kit part, cut off the locator pins, and attach the True Details parts with ACC. The problem was that no matter how careful I
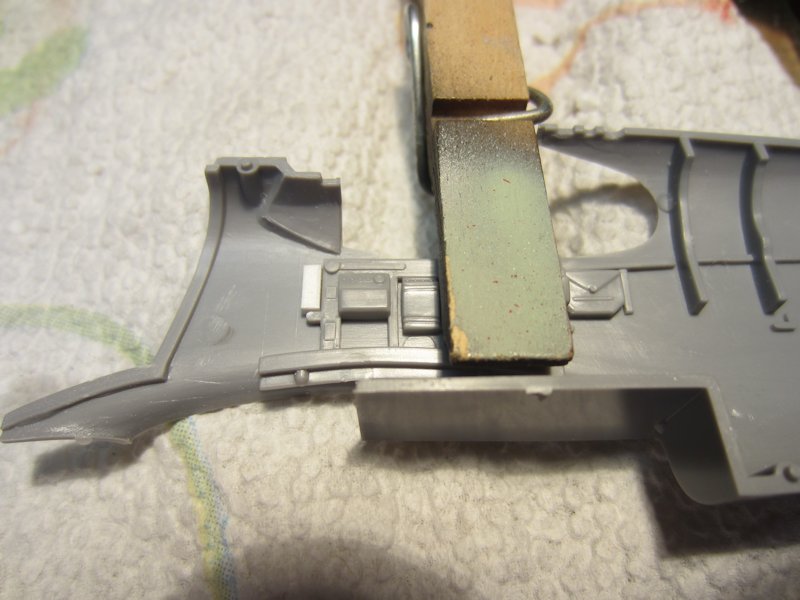
was, I ended up with alignment issues. To address the problem, what I did was this. I put the kit part in place, as before, and I did scribe some
markings, but I took a piece of scrap styrene strip and attached it to the fuselage side with white glue. I put it right where the locator nub for
the instrument panel protrudes from the front of the piece. |
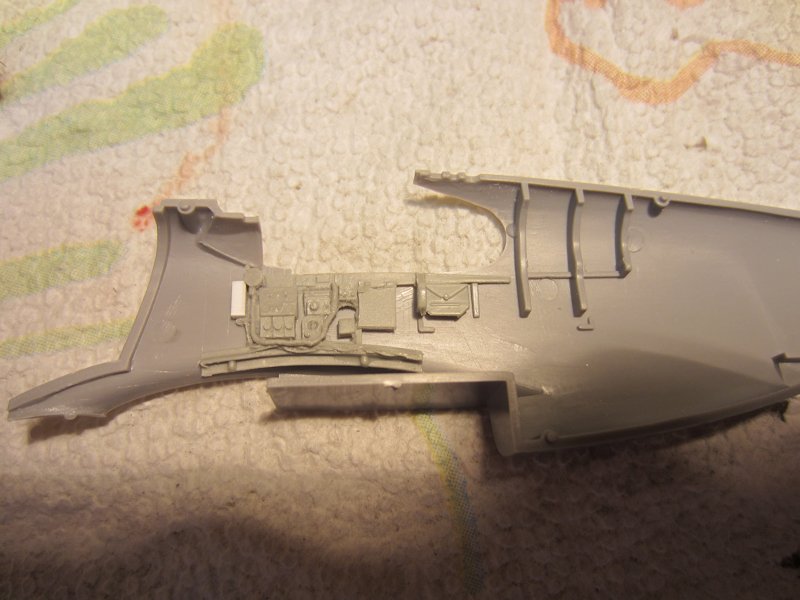 |
(2) Next, I attached the True Details part with ACC, making sure to snug it up against my temporary locator and my other
markings. Once the ACC cured, I was able to easily remove the locator, since I had only attached it with white glue. Dry fitting the rest of
the parts shows that I cured my alignment issues. |
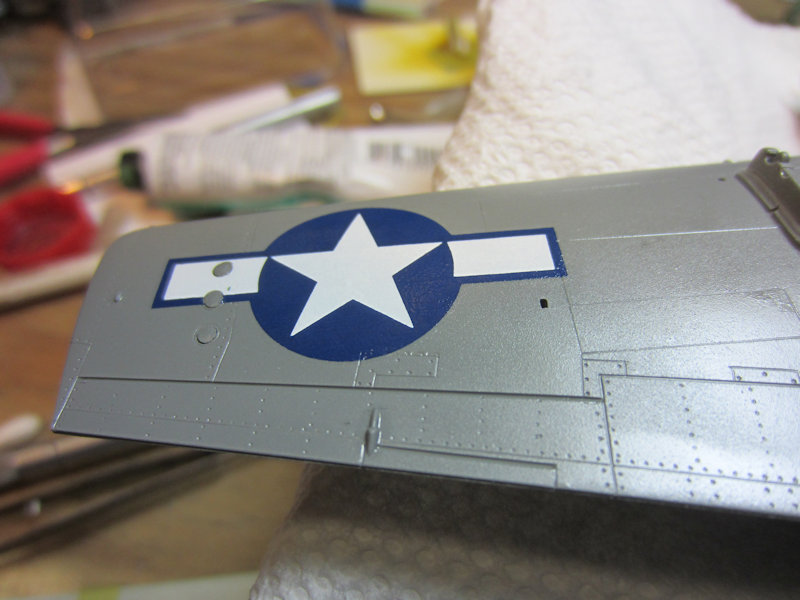 |
(3) One issue that I had with the A-36 was getting the national insignia decal over the formation lights on the bottom of the wing.
I tried making marks on the decal to locate the lights and punched out the holes with a Micro-Mark punch set. Even as careful as I was, the holes
weren’t quite in the right place and I wasn’t really happy with the results. After several days of trying to figure out how to line up the
holes better it finally came to me: use the mask from the Eduard masking set. I gently placed it over the decal, trying not to press it down too hard,
slipped it into the punch set and lined the holes in the mask up with the holes in the punch set. A couple of taps later and I had nicely lined holes
in the decal. |
 |
(4) In this shot I had applied most of the decals. According to
Fernando Rolandelli
and confirmed using John Stanaway’s Mustang and Thunderbolt Aces of the Pacific and CBI,
the Accurate Miniatures decals are missing a second Jackie and the emblem of the 530th
for the right side of the aircraft. I found a set of the decals that Fernando recommended for the emblem,
but was still short the second Jackie as of this photo. |
 |
(5) I snapped up one of ICM’s P-51A kits on eBay just to get the second Jackie decal (any
thoughts on how easy it would be to backdate the ICM kit into a model of NA-73X?). |
 |
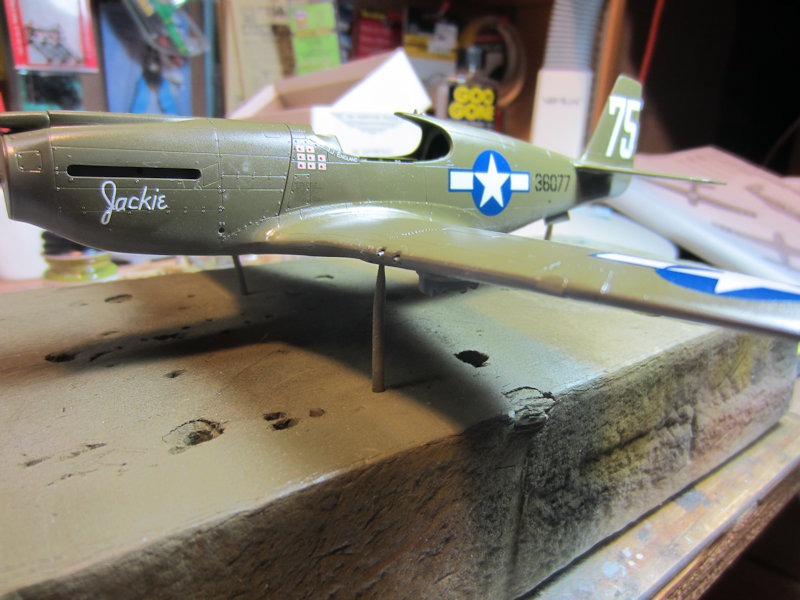
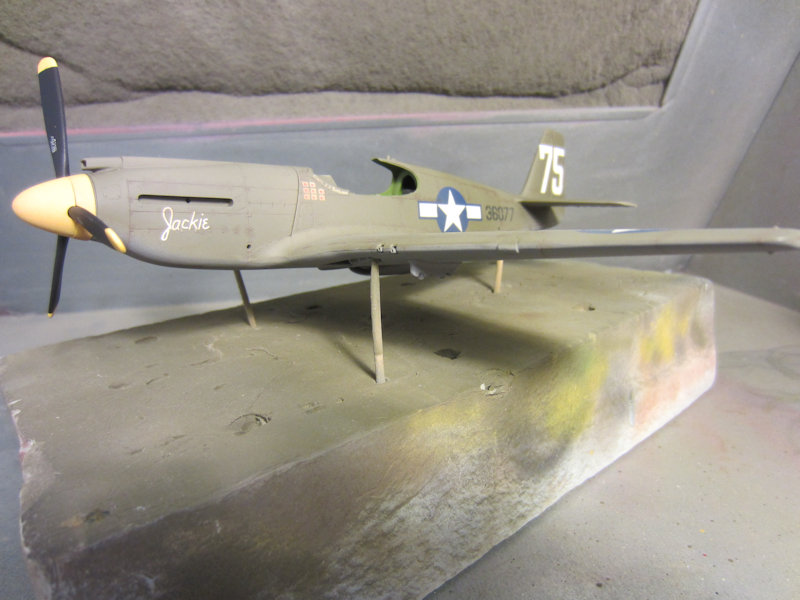
(6) The decals are all on and I’ve weathered the aircraft using a wash of burnt umber oil paint
thinned with Turpenoid. I followed that with a light overspray of Model Masters Afrika Khakibraun to blend
everything together and give the aircraft a well-used, slightly faded look. |
 |
(7) In this shot I’ve added the Scale Aircraft Conversions landing gear. I added brake plumbing to
the landing gear struts and painted them with a mix of Model Masters Aluminium and Neutral Gray to simulate the aluminized
lacquer of the prototype. |
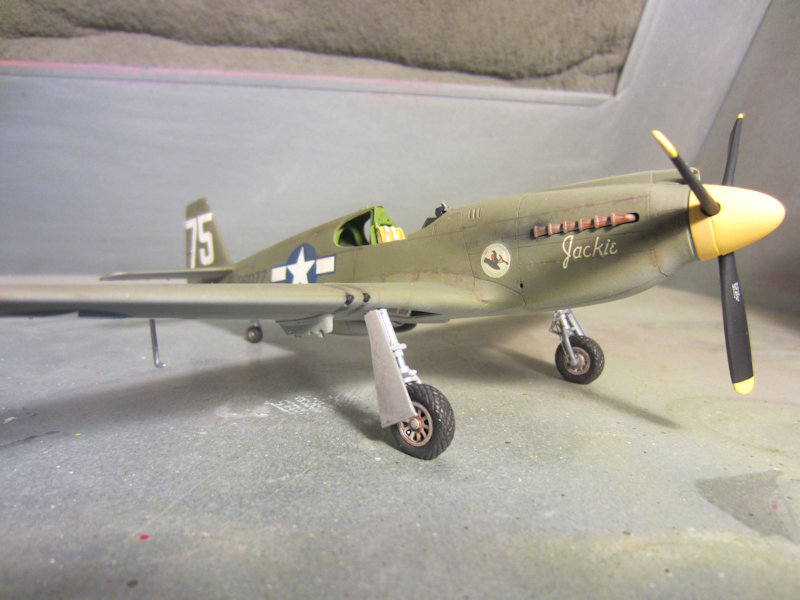 |
(8) At this point, I’ve also added the kit gun sight and the UltraCast exhausts. The photos of Jackie
in the Stanaway book do not show the severe exhaust staining typical of the Allison Mustangs, so I just added a bit of
soot using black chalk. |
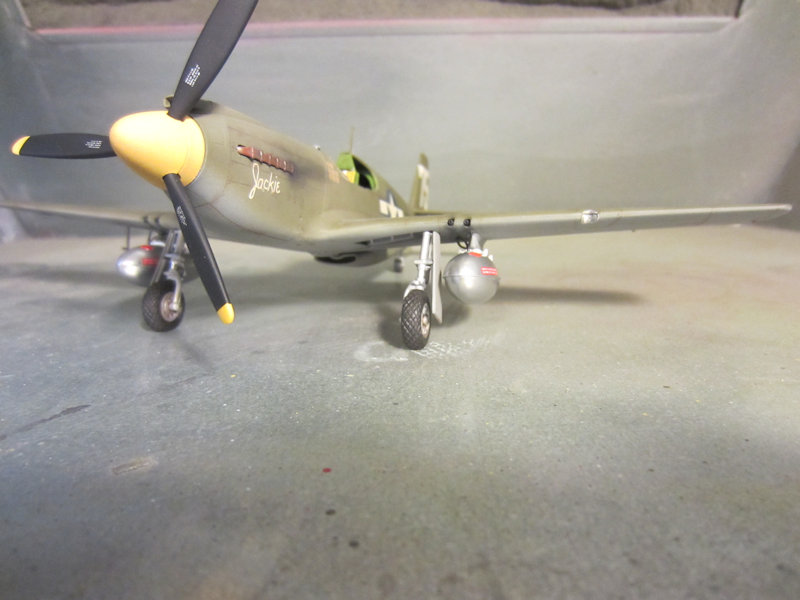 |
(9) I’ve added the external fuel tanks and plumbed them with wire from an HO scale locomotive
(I’m a model railroader mainly). I’ve also added the antenna mast. Now, though, I’m stuck. It turns out
that the Eduard canopy masks intended for the P-51A don’t include masking for the small window in the left
windscreen that was a characteristic of the P-51A Mustang. The set that does — set EX-171 — is intended for the P-51B.
It is also — apparently — rare. The only one I could find was in Great Britain, so the project is on hold until it arrives. |
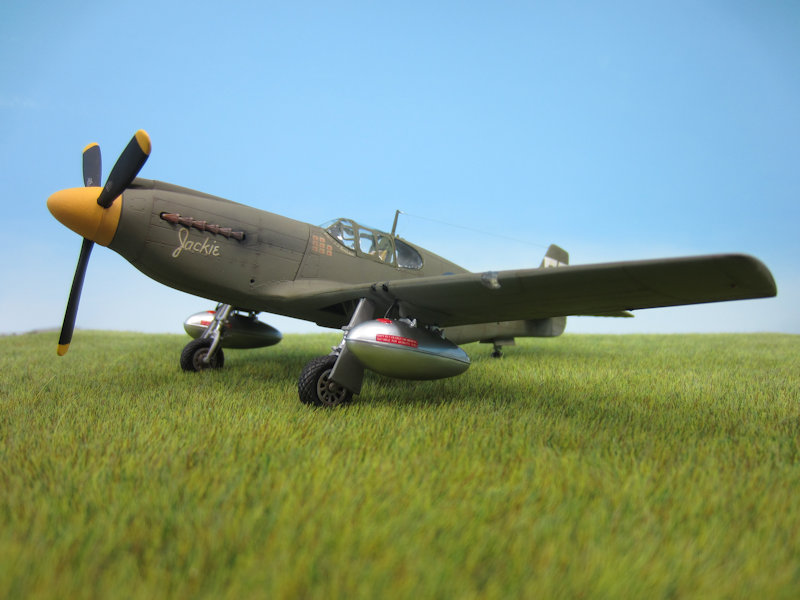 |
(10) The next few photos show the finished model. |
 |
(11) |
 |
(12) |
|
[home]
[trek]
[space]
[camel]
[p-51]
[vega]
[C&O]
[professional]
|